This week we presented some first stage of our ideas for Major Project.
For my major project, I have an idea to create a Cyberpunk environment. My inspiration comes from a Cyberpunk game made by CD Project Red, a company from my home country. The plan is to model everything in Maya, including buildings, street elements, and lighting. I’ll also model a sports car and incorporate neon lights. I intend to use Maya for asset creation, Houdini for effects like smoke, dust, and neon lights, and Substance Painter for texturing. Finally, I’ll use Unreal Engine for scene assembly and material setup, and Nuke for compositing to add smoke effects and fine-tune lighting.
First Drawing Sketch:
Model super sport car. I will use very similar paint to inspiration I found.
2016 World Endurance Championship. Banbury, England Ford GT Launch. 5th January 2016. Photo: Drew Gibson.
Test render in Maya for the back view:
Front view of main assets:
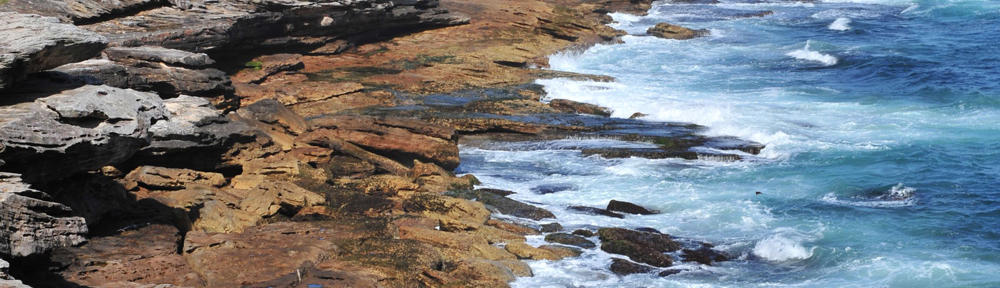
Environment inspiration:
Color Pallets for Environment:
Neon and street lighting:
Color pallets for a car:
2. Planning timing for Scheduled Major Project Module:
3. Short description. Explain time management and project set up with and existing time range:
I plan to start the project by focusing on hard surface modeling, with the main objective being the creation of a Ford sports car. I estimate this phase will take around 5 weeks, culminating in a test rendering featuring the car’s metal components exclusively.
Following this, I’ll transition to Substance Painter to apply labels and sport paint to the car. This phase will begin in week 2 and conclude by week 5, ensuring ample time for detailed texturing.
Concurrently, by week 4, I aim to commence neon modeling in Houdini, with the goal of incorporating dynamic lighting elements into the scene. Time permitting, I’m also interested in utilizing Nuke for compositing by week 12, allowing for final touches and potentially adding smoke effects to enhance the environment’s atmosphere.
Additionally, by week 5, I’ll undertake the modeling of all necessary assets for the scene, including buildings, street advertisements, and various environmental elements. This will ensure that the overall scene composition progresses smoothly alongside the car’s development.
This version aims to provide a clearer and more concise outline of your planned workflow and timeline for the project.
More Inspirations. Concept Art examples:
Storyboard:
I’m planning to swiftly pan the camera to the right side to reveal the car, ensuring the shot remains brief. Following that, I’ll capture a rear-back view accompanied by sound to enhance the scene.
Schedule Plan:
Week 1
This week ~I change geometry and concentrate to retopology some areas and divide model into parts and cut some faces.
Also, I began by working on the front bumper. I duplicated all the faces around it to ensure that I maintained the same shape. Using the image plane as a guide, I added thickness to the bumper and carefully aligned edge loop lines to ensure they remained cohesive and closely matched the original design.
Week 2
Continue modelling.
I’ve initiated the main asset modeling process by utilizing a lot of reference images. Beginning with a cylinder primitive, I selectively removed unwanted faces, leaving only those aligned with the front view of the blueprint. Employing Ctrl+E, I strategically inserted edge loops to trace along the blueprint lines, refining the shape with precision. Constantly scrutinizing the model from various perspective views, I meticulously adjusted vertices to ensure faithful adherence to the blueprint’s dimensions and contours. This iterative approach guarantees accuracy and fidelity to the reference imagery throughout the modeling process.
After establishing the main structure, I proceeded to craft the front bumper. To achieve this, I isolated the front panel and devoted my attention solely to this segment. Utilizing extraction techniques, I refined the contours to match the blueprint’s specifications accurately. Additionally, I crafted the lower bumper portion by introducing a cube primitive, meticulously aligning its vertices to adhere to the blueprint’s guidance. This focused approach ensures meticulous attention to detail in the creation of each component, resulting in a cohesive and faithful representation of the desired design.
Subsequently, I replicated the process for the back bumper, meticulously adhering to the blueprints and reference images to ensure precise alignment and proportions. Employing extraction methods, I isolated the bumper section, providing ample room for detailed refinement. Furthermore, I utilized duplication techniques, specifically duplicating a specialized half segment, to expedite the creation process while maintaining symmetry and consistency across the model. This methodical approach enables seamless integration of each component, resulting in a harmonious and accurate rendition of the intended design.
Creating honeycomb.
Houdini Sfi Shapes.
Rim:
Real sportscar rim:
To start my rim in Maya, I began by creating a cylinder and deleting all the faces behind it, leaving only the four front faces intact. This approach allowed me to maintain a reference for the shape I desired. While working, I utilized image planes and other references to guide my modeling process. Towards the end, I duplicated the special piece six times, each at a 75-degree angle. This method ensured consistency and accuracy throughout the creation process.
At the final stage, I selected all the vertices surrounding the cap and pulled them outward by pressing “b.” While the original design had the cap positioned inward, I chose to invert this approach, preferring the resulting shape. This adjustment allowed for a more aesthetically pleasing outcome to match my preferences.
Week 3
Test Render.
WEEK 4
This week, we had the privilege of hosting two esteemed industry experts to provide invaluable insights into our ongoing projects. The session commenced with each student presenting their work, encapsulating the essence of their projects with finesse and clarity. As the presentations unfolded, a rich dialogue ensued, characterized by a profound exchange of ideas and perspectives.
Under the expert guidance of our distinguished guests, Lucure took the lead in facilitating a dynamic discourse. Delving into the intricacies of each project, we meticulously dissected the strengths and areas for improvement, fostering an environment conducive to collective growth and innovation. The exchange was not merely limited to critique; rather, it was a collaborative exploration aimed at refining our approaches and enhancing the efficacy of our endeavors.
Testing light in UE Studio:
I conducted a brief test using automotive materials from the Epic Games Marketplace to gauge their behavior in a daylight scene. While the focus was on metals, the aim was to understand their interaction with natural light. This experiment serves as a precursor to crafting bespoke materials tailored to project’s needs.
Side view:
Back View:
ASSESMENT 1
For assessment purposes, I conducted a swift test by importing all the buildings I had created in Maya, arranging them in random positions. Additionally, I constructed a road and applied textures sourced from Polyhaven’s website to enhance the realism of the scene.
Using this setup as a foundation, I meticulously choreographed a sequence, positioning a camera at various angles to showcase both the environment and a simulated car. This approach allowed for a dynamic presentation that highlighted the interaction between the architectural elements and the surrounding landscape.
To further refine the presentation, I conducted a quick edit using Adobe Premiere, enhancing the visual narrative with seamless transitions and effects. Additionally, I incorporated free music sourced from reputable online platforms, elevating the overall aesthetic and engaging the viewer on a deeper level.
In essence, this comprehensive test encapsulated the integration of various tools and techniques, demonstrating not only technical proficiency but also a keen eye for composition and storytelling. It served as a testament to my ability to craft compelling visual experiences while leveraging a diverse range of resources.
WEEK 5
Modelling buildings and trip to Schoreditch to photograph some inspirations to my environment.
This week, I dedicated time to modeling buildings, inspired by Cyberpunk gameplay visuals. I explored Shoreditch for urban inspiration and glanced through architectural magazines. With my iPhone, I captured images to enhance my project. Despite only completing three models, these efforts enriched my work with urban authenticity and creativity.
Cyberpunk buildings:
I began by constructing the tops of the buildings, starting with cylinders and dividing them into six sections. Using the multi-cut tool, I added additional lines to replicate the shapes depicted in the image I found online. The goal was to closely match the architectural details observed in the reference picture.
John Lautner. Malin Residence (Chemosphere), Holywood, CA.
London Schoreditch and Hoxton:
Other Inspirations I found on internet:
Back into car modelling:
I revisited car modeling to complete the front reflector, a task I had previously left unfinished. This component proved to be quite intricate, and I anticipate it may take a few more days to finalize. My aim is to meticulously replicate the original design, ensuring a high level of fidelity to the original model.
I began by creating a cube and deleting the faces behind it, aligning the edges with the reference image plane. Following the lines visible on the reference, I shaped the internal sections where light emits. Using the Ctrl+E command, I extended and refined the shape, extruding it both outward and inward to match the desired form. After extracting the primary shape, I added edge loops to maintain its integrity and align with the divided sections, ensuring precision hroughout the process.
In conclusion, I’ve decided to temporarily shift my focus away from car modeling. I found that delving into building modeling interrupted my workflow, making it challenging to regain momentum upon returning to the car project. Recognizing this distraction, I’ve realized the importance of maintaining focus to ensure efficiency and progress. Therefore, I’ll prioritize building modeling for now and revisit car modeling when I can dedicate my full attention to it, ensuring a smoother and more productive workflow.
This week, I continued my work on modeling the front light interior, which proved to be quite challenging, primarily due to its unique and specific shape. I spent a considerable amount of time contemplating the best approach to model it effectively.
To begin, I initiated the modeling process by creating a basic box shape, which served as a foundation. Then, using reference images as my guide, I meticulously examined the intricate curves and contours of the light. Employing the Ctrl + E shortcut, I extruded lines along the curvature of the reference, meticulously shaping the geometry to match the desired form.
As the shape gradually took form, I repeated the extrusion process along the vertical axis (blue direction), ensuring that both the top and bottom sections mirrored each other perfectly. This duplication helped maintain consistency and accuracy throughout the modeling process.
Overall, while the task presented its challenges, I approached it with patience and attention to detail, resulting in a more refined and accurate representation of the front light interior.
After successfully modeling the bulb and its frame, I proceeded to group them together for easier management and manipulation. Grouping allows me to treat the bulb and its frame as a single entity, simplifying further modifications and adjustments.
Once grouped, I focused on ensuring that the sizing of the duplicated shape matched the original design accurately. Using scaling tools, I carefully adjusted the size of the duplicated bulb and frame to align with the intended dimensions. This step is crucial for maintaining consistency and coherence in the overall design, particularly when dealing with multiple identical components.
By scaling down the duplicated bulb and frame to match the original sizing, I preserved the integrity of the design while effectively replicating the desired elements. This approach ensures that both bulbs maintain identical proportions, enhancing visual harmony and cohesion in the final model.
Perspective View of Main Assset:
Conclusion:
The modeling is still ongoing, and currently unfinished parts include the windshield wipers and the frame for the rear window. Unfortunately, my initial estimate of time was too optimistic, and I must admit that at times, the task proved to be exceptionally challenging, requiring more from me than I anticipated. Nevertheless, despite these challenges, I believe the result is already quite promising.
Certainly, it is a demanding process, but I try to approach it with determination and dedication. Although at times it stretches beyond my current capabilities, I can see clear progress in the model. I hope that with further effort, I will be able to bring the project to completion with a satisfying outcome.
WEEK 7
Creating Realistic Textures for 3D Models
This week, I focused on texturing my 3D models in Substance Painter, starting with custom textures created in Quixel Mixer. Here’s a brief overview of my process:
Step 1: Creating Base Textures in Quixel Mixer
Mix Textures: Combine two or three base textures.
Layer and Blend: Use Quixel Mixer to blend these textures, adjusting opacity and blending modes.
Add Details: Incorporate cracks, stains, and roughness variations.
Export to Substance Painter
Export the texture maps (diffuse, normal, roughness) for use in Substance Painter.
Step 2: Refining in Substance Painter
Import Textures: Apply the custom textures to your 3D model.
Add Layers:
Dirt and Grunge: Use masks to add dirt textures.
Graffiti: Place graffiti textures with masks.
Edge Wear: Apply edge wear using generators.
Step 3: Matching Reference Images
Analyze References: Study images for color and weathering patterns.
Adjust Layers: Continuously tweak layers and masks to match the reference.
Final Touches: Make final adjustments for color and detail accuracy.
By following this workflow, I created textures that closely match the reference images, adding realism to my 3D models.
Ref:
I started this building by using a cube and beveling the edges, carefully referencing images to achieve a similar shape. Then, I created pipes, adjusted their dimensions, and copied them along the structure.
Creating an entrance for the building:
An entrence textured. Front View.
UVing building before taking it to substance:
Mostly, I was creating my own textures in Mixer by mixing two or three textures and exporting them to Substance for creating new textures. By adding another layer mask with dirt, grunge, and graffiti, I made buildings closely look like my references I found on the Internet. There below are screenshots in Unreal Engine scene with applied new textures and changing settings in Unreal for no mipmaps for each normals, base color, and ambient occlusion.
Side View:
Front View:
Back View:
Addind some grafitti:
Here, I conducted Arnold test renders to observe how metals behave under dramatic lighting conditions. Specifically, I focused on studying the interaction of metallic surfaces with intense lighting setups, aiming to capture the nuanced reflections and highlights that add realism to the scene.
Creating Japanese style Building for Cyberpunk Environement.
I spent a weekend in Marbella, where I found a lot of inspiration for my environment design. I took several pictures of buildings that caught my eye. I chose one in particular and decided to give it a Japanese-style vibe.
I began by creating a narrow-shaped balcony and then copied and resized it to smaller dimensions, maintaining a consistent distance between each one. Next, I designed the base floor with an entrance and added a Japanese-style roof on top. Additionally, I connected each balcony to the main structure.
Here, I named all parts and assigned new materials to each object in the building:)
For certain parts, I utilized the concrete material provided in Substance Painter, but I added additional layers to enhance its appearance. Using a new fill layer with a black mask, I manipulated grayscale values to introduce elements like grunge and stains. Additionally, I crafted paint layers to simulate leaks and additional stains by employing the alpha brush in the paint section of Substance Painter.
Before exporting to Unreal Engine, I experimented with Substance Painter’s render viewport for previewing the textures.
I added more details to the building, including pipes and air conditioning units. Additionally, I incorporated large and small pots for trees and flowers to breathe life into the environment.
Creating Uv maps and exporting to substance:
Creating my won metal material in Substance and applying it for models. (Substance render image)
Here’s an example of how I created a texture for an air conditioner in Quixel Mixer. I combined three textures and adjusted settings such as height opacity and blending for each layer to achieve the desired result.
Air condition ready to export to Unreal.
WEEK 9
This week, I decided to take on a more detailed project, inspired by the cyberpunk vibe I love from playing games. I wanted to make two buildings connected by a garage, where I could park a car and take cool shots with dramatic lighting later. It’s a bit tricky, but I really wanted to challenge myself. I started by making the models in Maya, like I usually do, and made sure to name everything so it’s easy to find when I work on textures in Substance and Unreal later.
I started by modeling a single wall and gradually expanded to cover the entire structure. Then, I integrated windows into the design, separating them from the building for added detail. Additionally, I began creating street lights and some barriers to enhance the overall scene.
Uving smaller building:
Detailing building with fans and wires.
Uving entire building:
UV Checker Render:
I streamlined my workflow from Maya to Substance Painter, using Mixer solely for generating textures. After modeling in Maya, I imported my models into Substance Painter to refine and create custom textures or adjust existing ones. Once satisfied, I brought these finalized textures directly into Unreal Engine for implementation, skipping Mixer altogether in the texturing process.
Building ready for an export to Substance and apply new textures:
Here in Substance. I began by applying a concrete texture to the building and then adjusted its color to find a shade similar to the rest of the structure, maintaining consistency. Additionally, I created new fill layers with black masks to introduce elements like grunge or leaks in grayscale. To address corners and certain sides, I utilized paint with an alpha brush for more precise detailing.
Here is a screenshot of the gate of my building, which will likely be the first shot in the garage. I created the sign on the gate using the Jura font in Substance Painter. The process for adding the font is similar to adding dirt or grunge. First, create a fill layer and then a black mask. In the black mask section, add another fill layer and search for the Jura font. Then, add another fill layer in the same section, change the blending mode to subtract, and add grunge to create imperfections on the font.
I added more details to the air conditioning units by downloading Mitsubishi logos and applying different variations of these logos to the models. This enhances the visual interest and adds more detail to the environment, especially for shots taken from the roof.
The back View Of the building:
Simultaneously, I began blocking out the buildings in Unreal Engine to visualize their positions and overall layout.
In another project, I created a turntable in Unreal Engine. I applied automotive textures from the Epic Games library and used the Sequencer to create a turntable animation for breakdowns.
Week 10
This week, I started modeling a building inspired by a shopping center in Warsaw. I was particularly influenced by the architectural style of Polish buildings from the 1980s and 1990s, which were heavily influenced by Soviet design. These buildings often featured a specific aesthetic characterized by utilitarian forms, concrete materials, and a sense of robustness. I believe this architectural style fits well within a cyberpunk environment, blending the gritty, industrial look with futuristic elements.
ref image:
This building, while it may not seem so at first glance, was quite complicated to construct. I began with the tallest structure and then moved on to the smaller ones. Although they appear similar, each building has unique characteristics. The stairs were particularly challenging to model, and I also had to create UV maps for them.
Here are some towers I brought into Substance Painter, where I created custom glass materials for each. I modeled these buildings quite some time ago; they are low-poly and will be positioned far in the background behind the main assets and buildings in the scene.
Cyberpunk Tower 1
Cyberpunk Tower 2
The next step was to export the model to Substance Painter and create all the textures, including graffiti, signs on the doors, and dirt. For some of the graffiti, I found images online, imported them into Photoshop, inverted the colors, and used spray textures to create custom masks. I then adjusted the settings within Substance Painter to achieve the desired look. Finally, I imported the model into Unreal Engine and recreated the textures using the materials exported from Substance Painter.
Week 11/12
This week, I created some street elements for my environment. I used references I found on the internet to design street lights. After that, I textured them and added them to the scene.
Reference Image found on internet.
Preparing UV for projecting animated texture:
Set up in Unreal for animated texture:
Blocking Environemnt:
Here, I’ve begun positioning the buildings within the Unreal Engine. Additionally, I’ve been experimenting with various weather conditions to find the optimal lighting setup. I’ve utilized a directional light for general illumination, while for specific shots, I’ve switched to daylight with a wet floor effect and incorporated sunset lighting.
Preparing scene for render.
Adding all assets. I used two tree assets I found on epic games and I aslo downloaded velocity blood example found in Megascans.
Week 12
Started building last skyscrapers for my environment. Cyberpunk Cafe Building
Images from Environment/RENDERED IN SEQUENCER (EXR):
Assets used from Epic Games Marketplace:
Megascans: Sign Stop, Blod Decals, Road Crack Decal, Asfalt Material.
Quixel Mixer Materials Blended:
Smart Material Created in Substance:
Week 13
Project Title: Cyberpunk Cityscape
Description:
In this project, I aimed to craft a captivating cyberpunk cityscape, showcasing my expertise in 3D modeling, texturing, and environment creation. Central to this endeavor is a meticulously crafted sports car seamlessly integrated into the futuristic urban setting.
Process:
3D Modeling:
I meticulously modelled a high-poly sports car, focusing on intricate details like aerodynamic curves and realistic materials.
Texturing:
Employing Megascans textures and custom creations in Substance Painter, I ensured a consistent and lifelike appearance across the scene. Mixer Quixel Bridge facilitated blending textures for added depth, while utilizing blend mode enhanced the realism of road textures.
Environment Creation:
Within Unreal Engine, I arranged all elements to compose a cohesive cityscape. Strategic placement of buildings, streets, and props contributed to the immersive environment. To enhance visual depth, I incorporated rain effects and assets like Desert Vegetation from the Marketplace.
Lighting and Composition:
By experimenting with diverse lighting setups, I achieved a captivating contrast between vibrant neon lights and moody, diffuse illumination. Guiding the viewer’s gaze through deliberate composition, I positioned the sports car as the focal point amidst the sprawling cityscape, leveraging Unreal Engine’s Sequencer for dynamic shots.
Marketplace assets (rain effects), Desert Vegetation Megascans assets: Stop Street sign, High Velocity Blood Decal for decoration environment.
Conclusion:
This project, completed in just 13 weeks, pushed the boundaries of my 3D modeling and environment creation skills. The combination of intricate models, high-fidelity textures, and dynamic lighting resulted in a striking cyberpunk cityscape. Despite time constraints, I accomplished more than expected. Modeling and texturing took longer than anticipated, so I couldn’t create as busy an environment as initially planned. However, I’m satisfied with the number of buildings included. With more time, I could have added smoke effects to the pipes and animated more neon signs to make the environment more vibrant and dynamic. Despite the challenges, this experience taught me patience and the value of thorough research in problem-solving.


 Creating honeycomb.


 In another project, I created a turntable in Unreal Engine. I applied automotive textures from the Epic Games library and used the Sequencer to create a turntable animation for breakdowns.


 Cyberpunk Cafe Building


 WIREFRAME


