WEEK 1
Nuke 3D and Camera Projection
This week we looked at the basic tools used in a 3D scene within Nuke. Below are some of the key feature discussed.

WEEK 2
Nuke 3D Tracking
Tracking
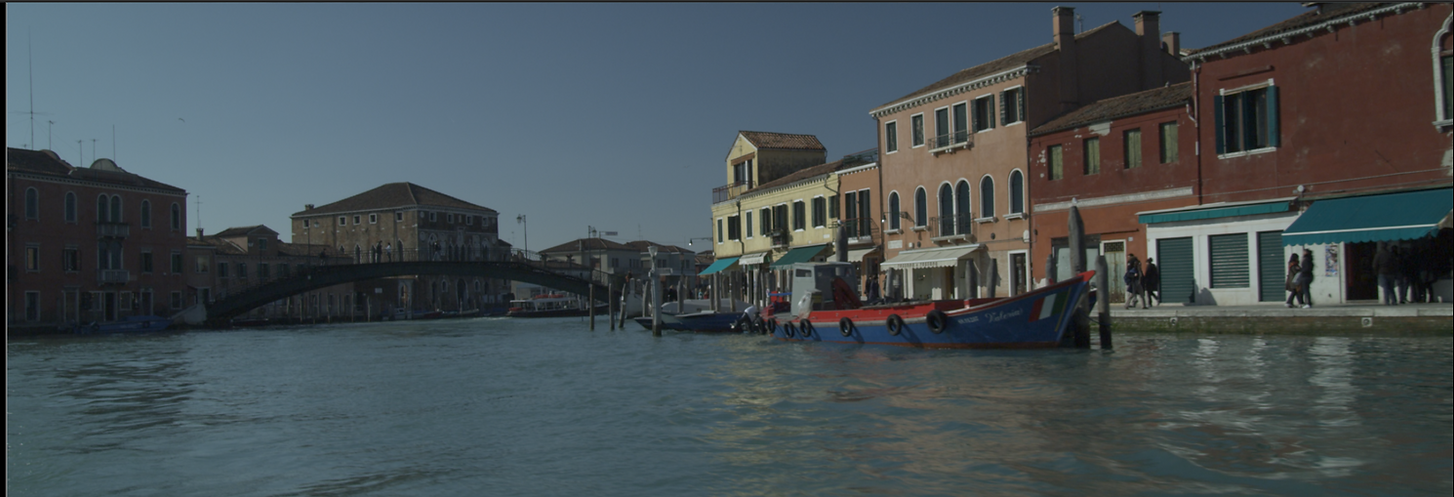
Started by creating a roto shape around the houses in the clip avoiding the water as we will be tracking. Below the tracking markers can be seen in green after removing all the non-viable tracks.
Script
Adding in a camera tracker creates this section of the script automatically. Creating the two camera set ups ready to be used in the 3D space.
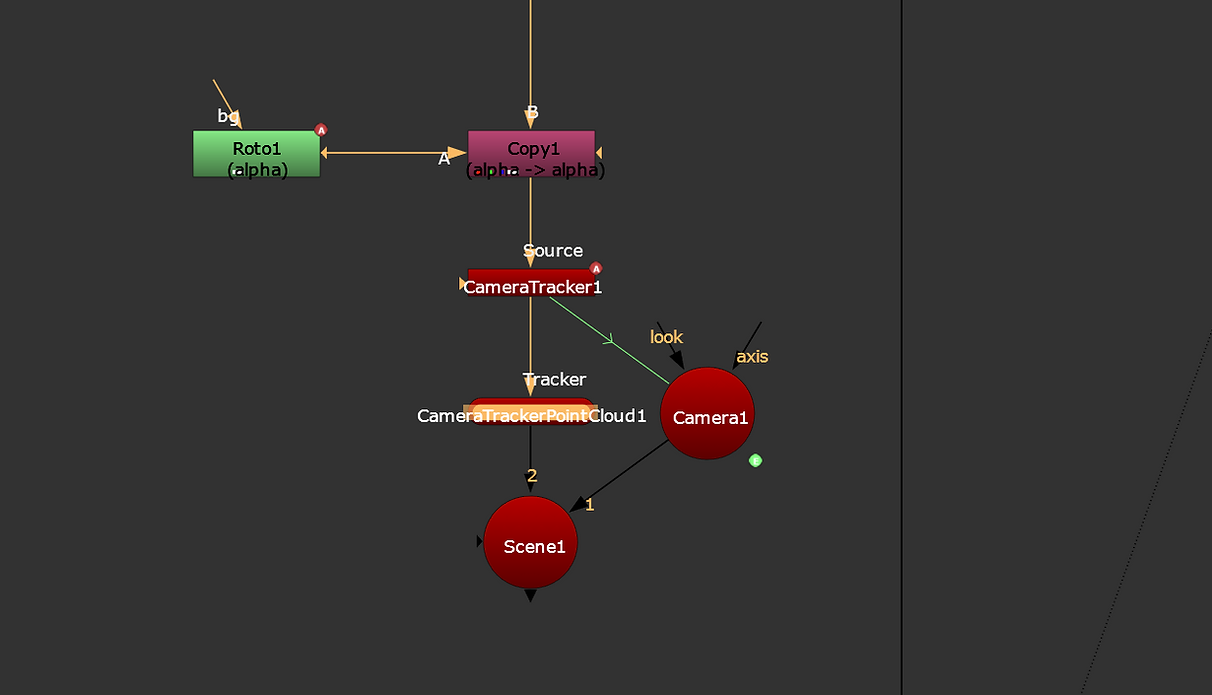
Point Cloud
The tracking markers made previously become the point cloud in the 3D space viewer as seen below. This shows the scale and placement of the buildings rotoscoped before.

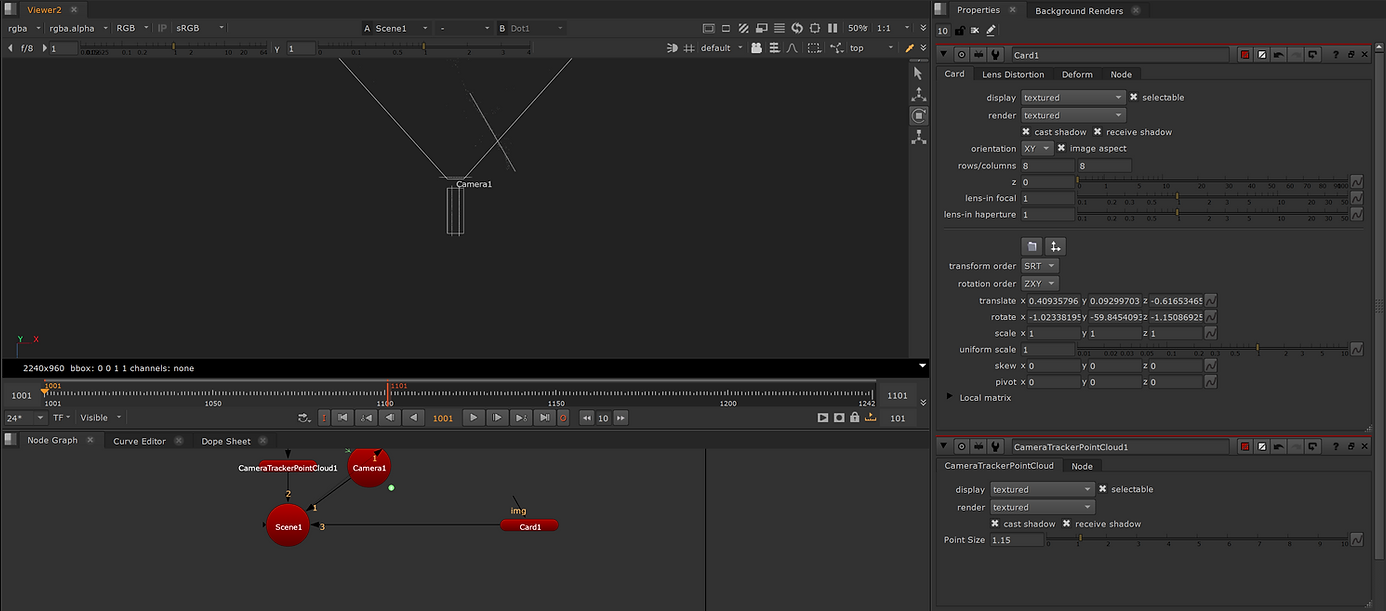
Card
I then placed a card (equal to a ‘plane’ in Maya). The card will be used to project the texture on to over the building later on. The trackers mean the card will follow the line of the camera.
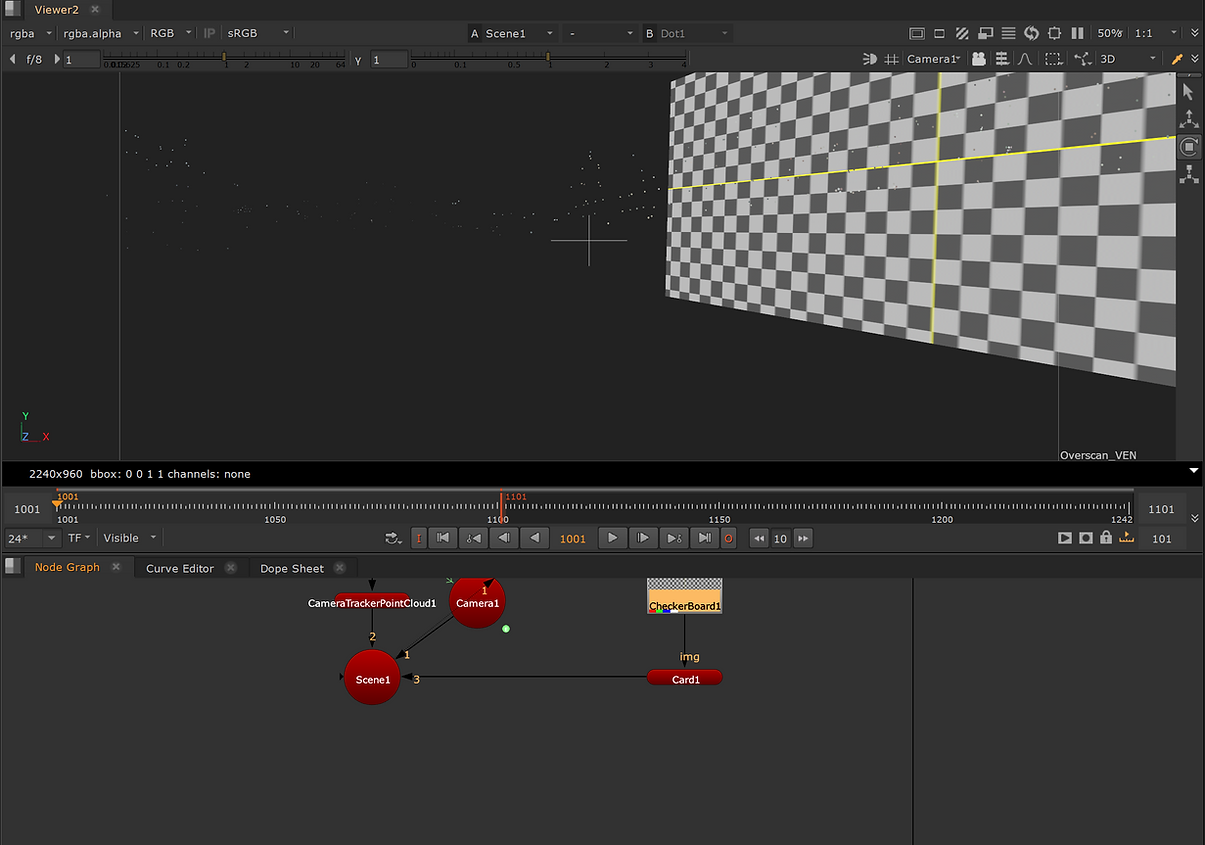
Texture
Here I applied a checkboard texture just to check the process has worked.
Script
Here I copied the script from before and made a second version to start the roto paint process of removing the window I tracked earlier. Below shows the additional nodes added to complete the next steps.

Roto
I rotoscoped around the window to remove it from the image and rotopainted over the area to blend in with the surrounding wall.
Before
Before the window was removed.

After
Final image without the window being visible.
WEEK 3
3D Equalizer Overview
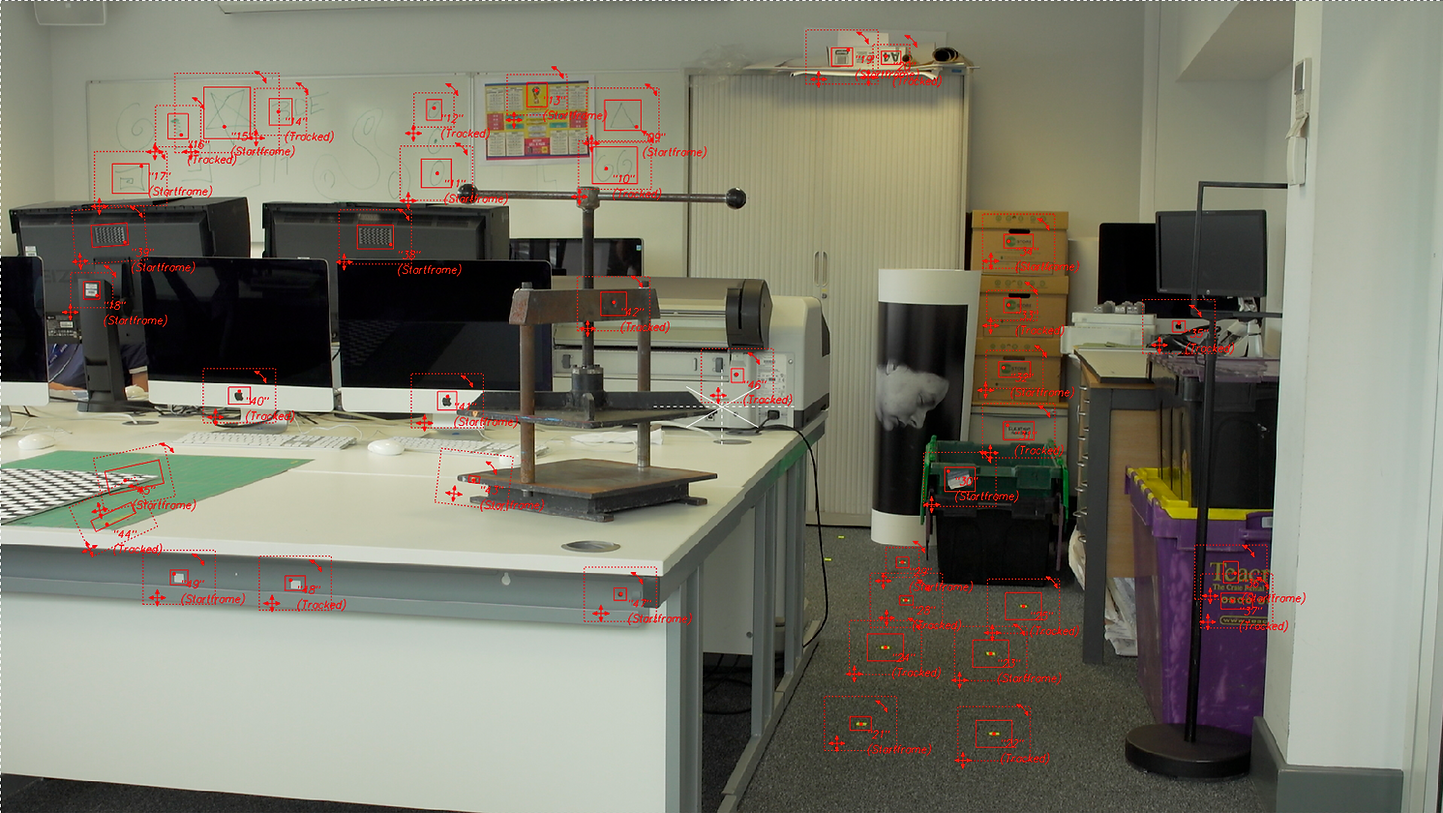
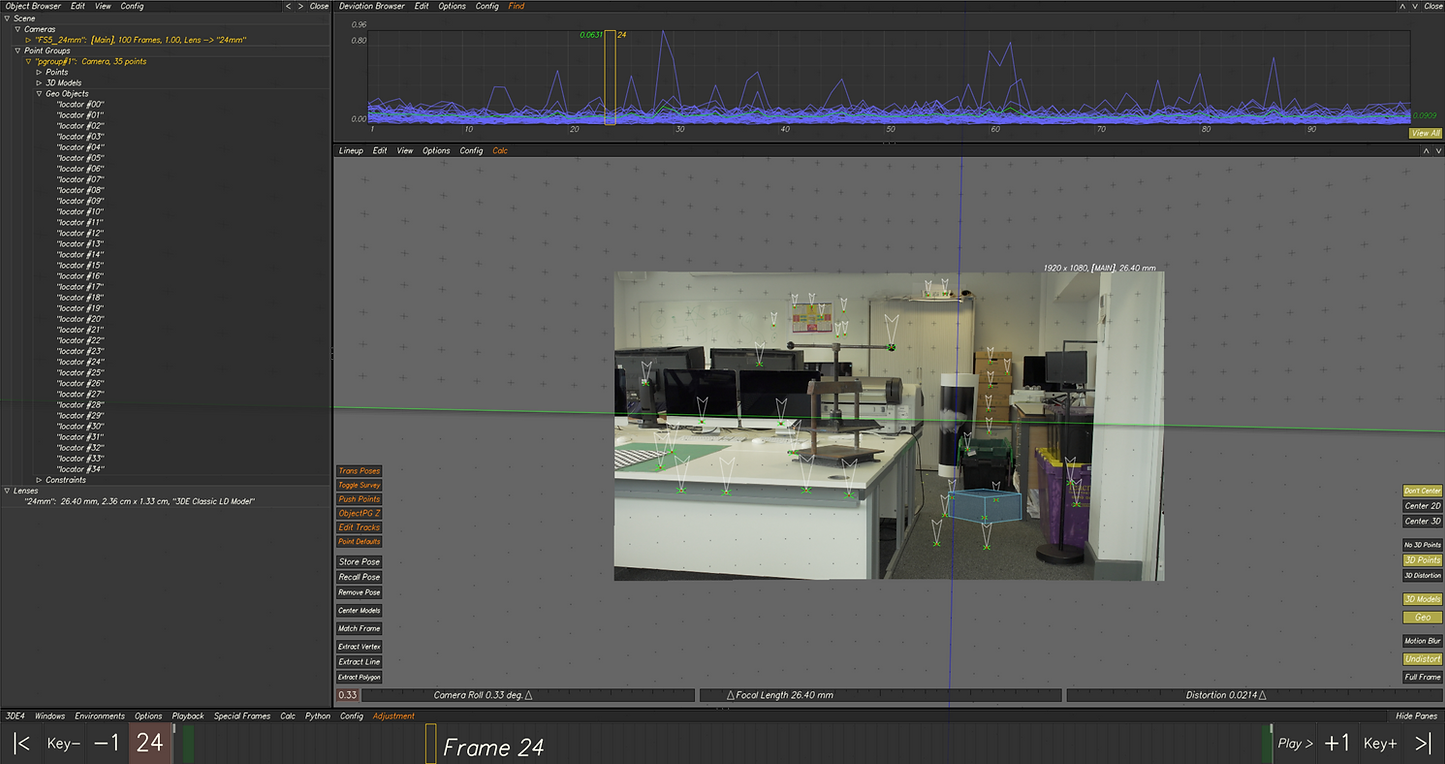
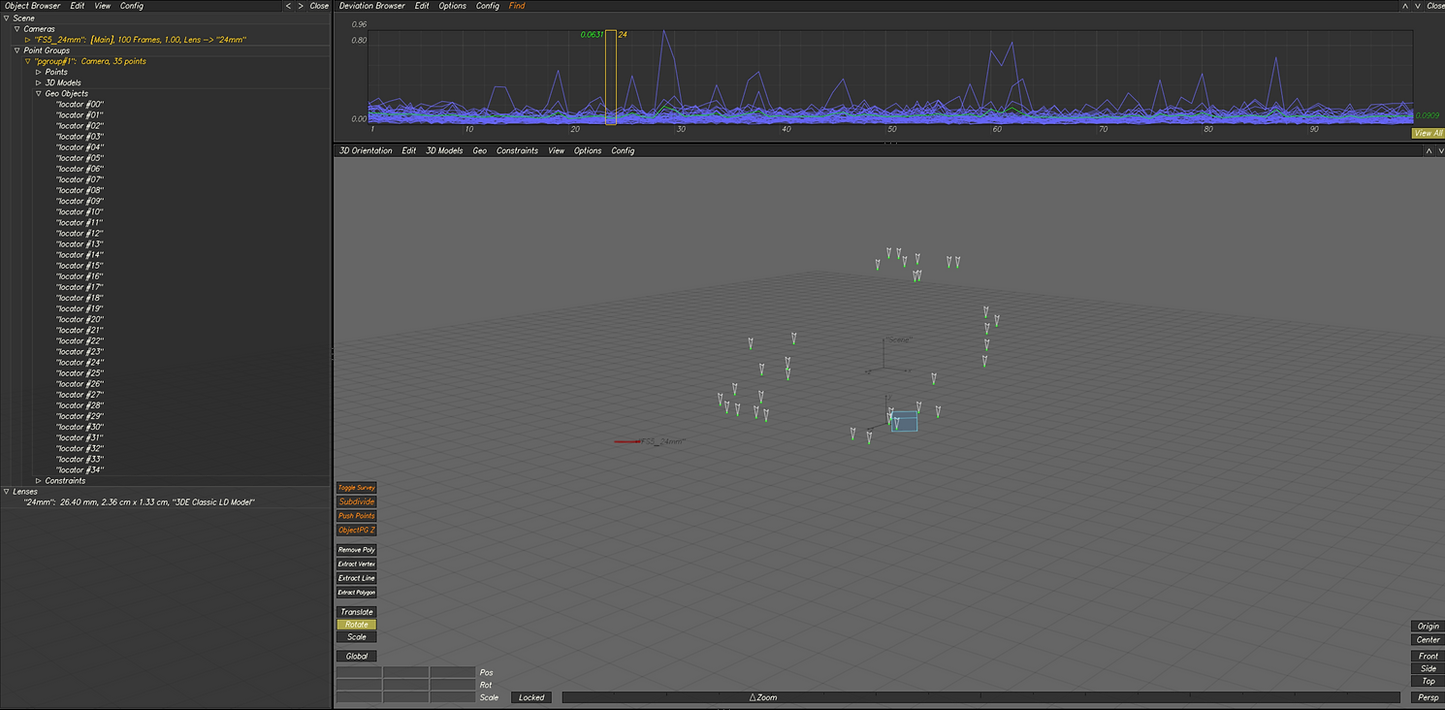
This week we went over the basics of how 3D Equalizer works. We used the below image as reference for where to place the trackers in the scene. Once all the trackers were done, I created locators to define where the tracking points are. This then translates into the 3D space where the 3D object can then be placed as seen below. The final number on the deviation was 0.09 (the aim to be below 2.0).
Locators in 2d Space

WEEK 4
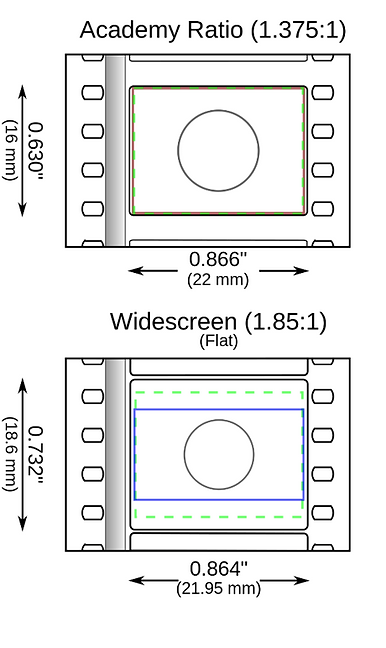
Cameras and Lenses
– Cameras refers to an image sequence or plate in 3DE.
– Lens refer to a pairing of a camera and lens in 3DE.

WEEK 5
3DE Free-flow and Nuke
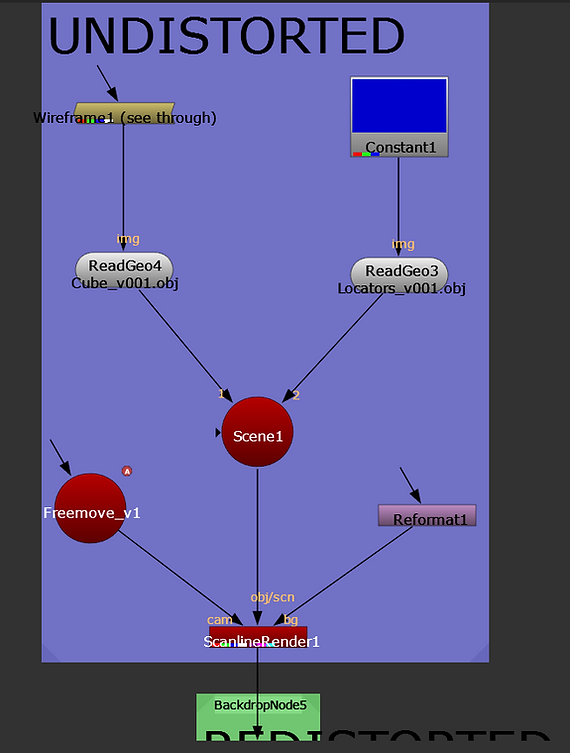
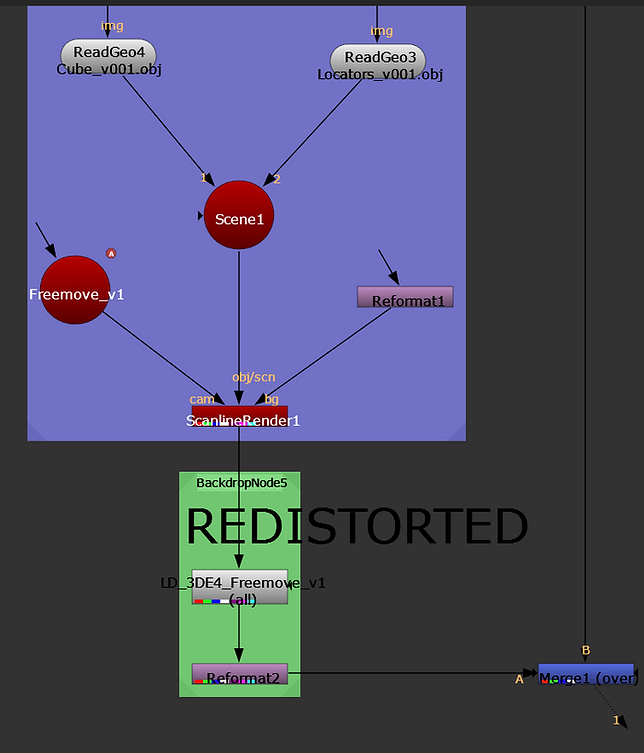
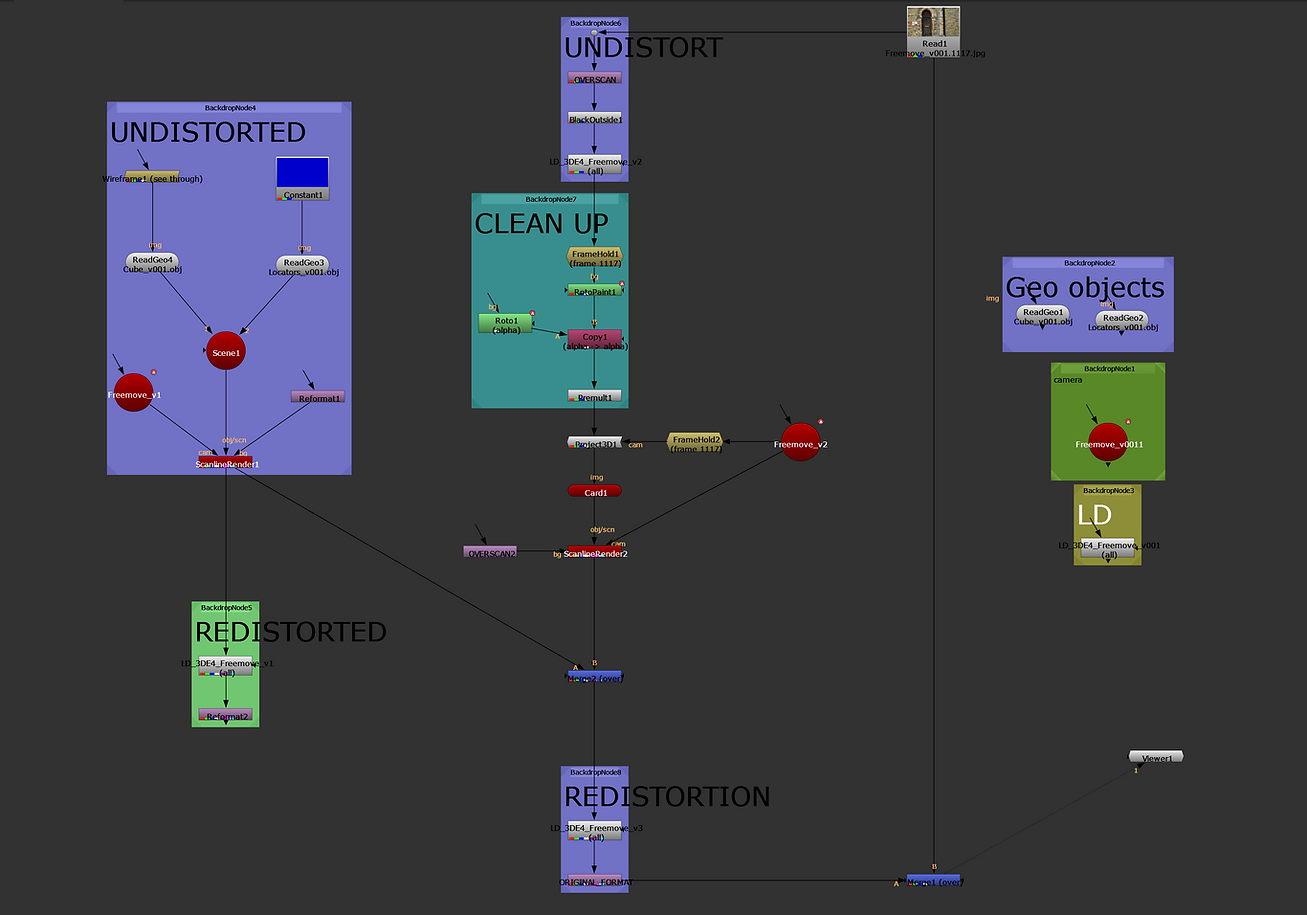
Covering the pipeline of how to take the data from 3DE, such as cameras, objects and lens distortion into Nuke. Then how to create a script in Nuke to removed and reapply lens distortion to make the 3D objects fit the 2D scene.
Creating Locators

Adding the Cube

Importing Data into Nuke

Creating the Camera

Node Graph with Distortion Application
Roto Shape and Paint

Adding the Card
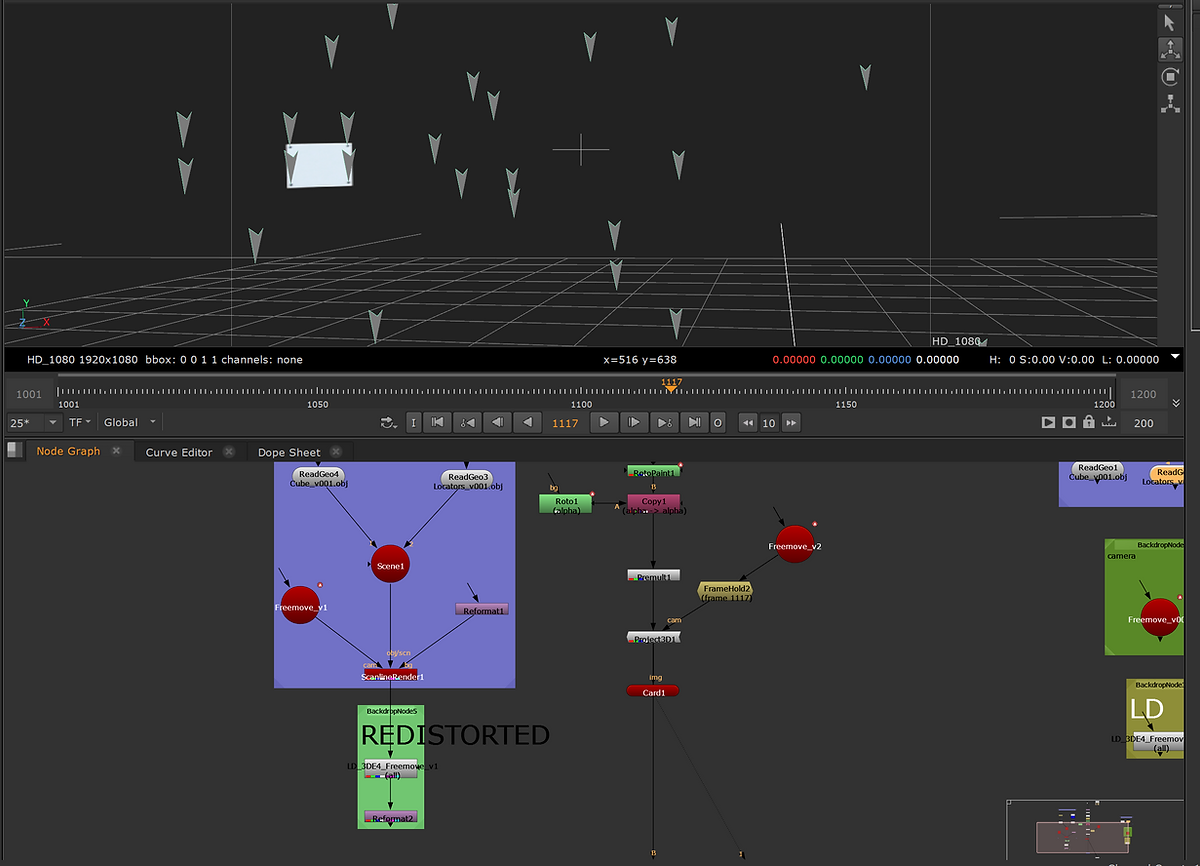
Final Image with Locators (sign removed)

Full Script for the Whole Process
WEEK 6
Surveys
This week we looked at surveys in 3DE. The process of adding extra tracking information to the sequence by tracking on the references images first, then projecting the tracks on to the main sequence.
Creating the individual points

Showing the ref images in outliner

Tracking point on one of the ref images

Assignment 01
Reference Image

3DE
Tracking Markers
First I started by tracking the scene using the manual tracking mode. I placed trackers at various depths across the scene for better camera/tracking accuracy.
Lineup View (tracks)
Here the trackers can be seen before I edited the lens distortion and parameters.

Deviation Browser
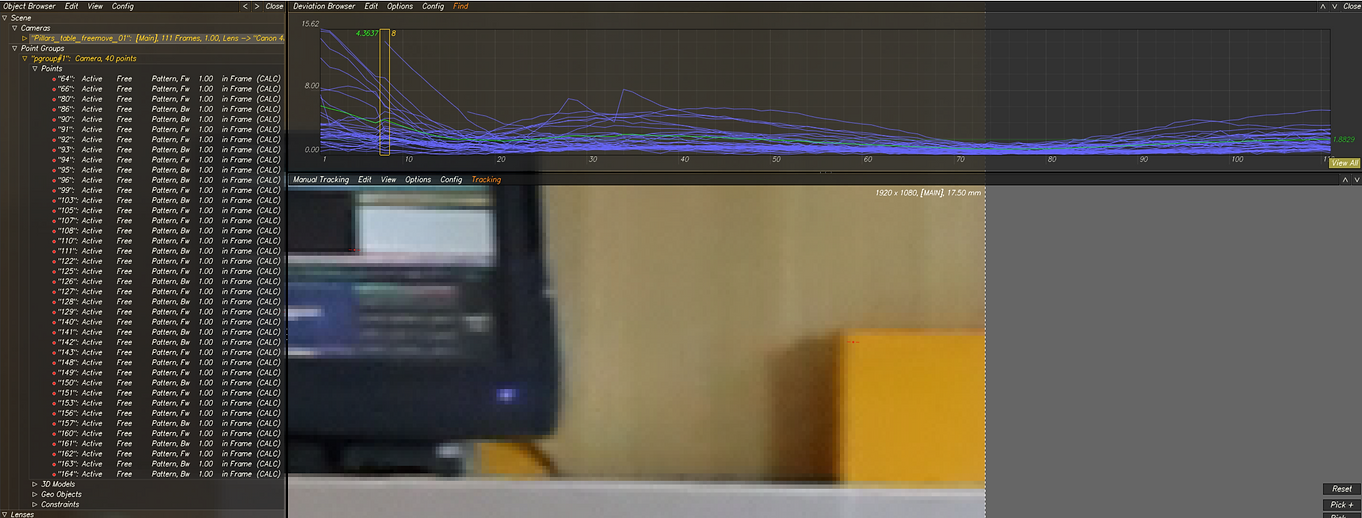
Final Deviation & Point Cloud
This is the final number of the deviation browser after the lens parameter and distortion were adjusted (shown below).

Lens Data
This is the lens data I input into 3DE as the beginning for better data accuracy.

Lens Parameter

Lens Distortion
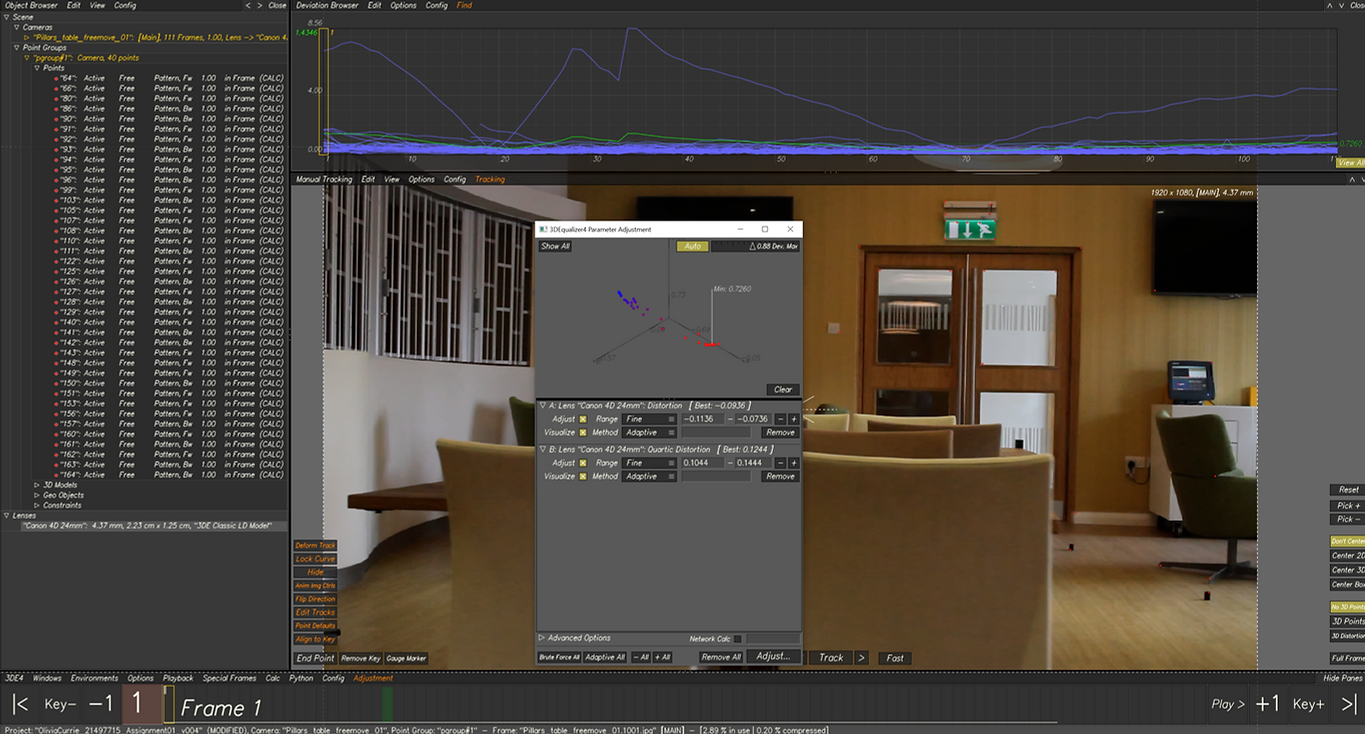
Locators
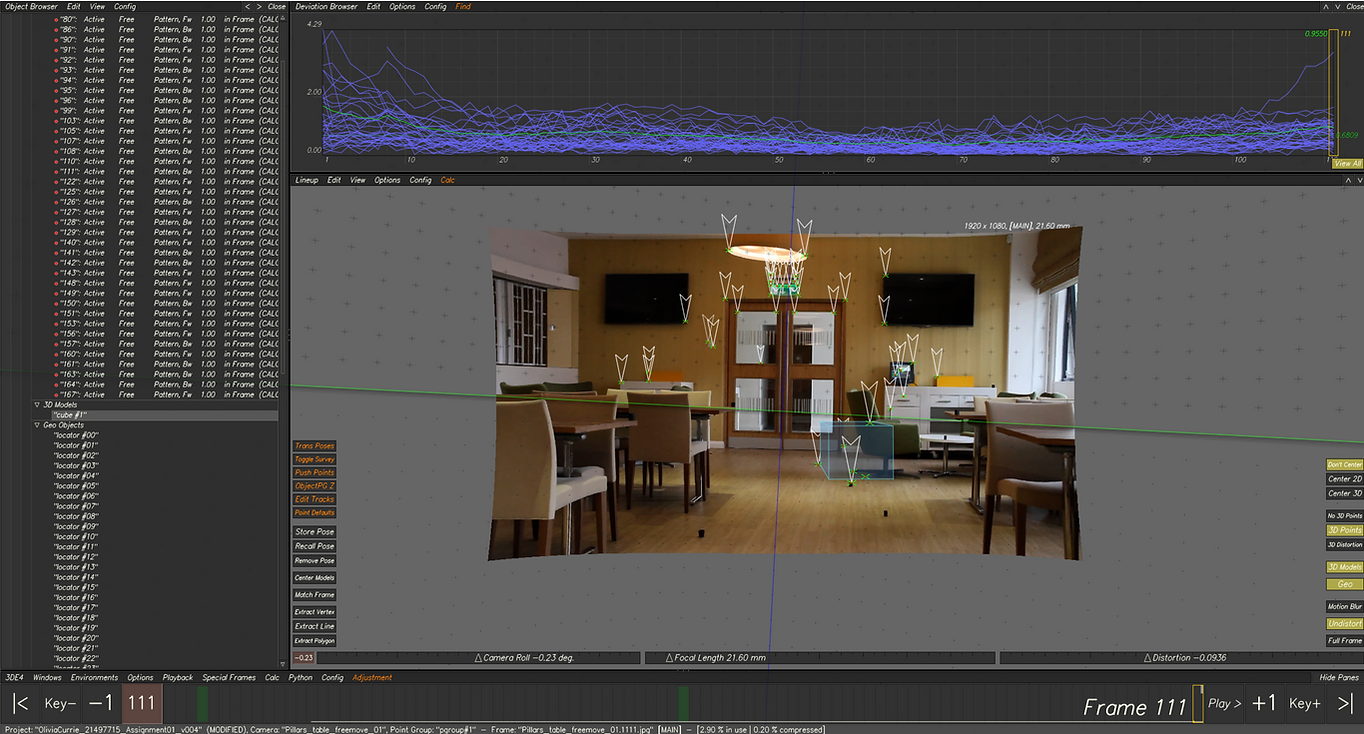
I then added in the locators so the tracking points could be clearly seen. I scaled them down slightly so they didn’t take up too much of the image.
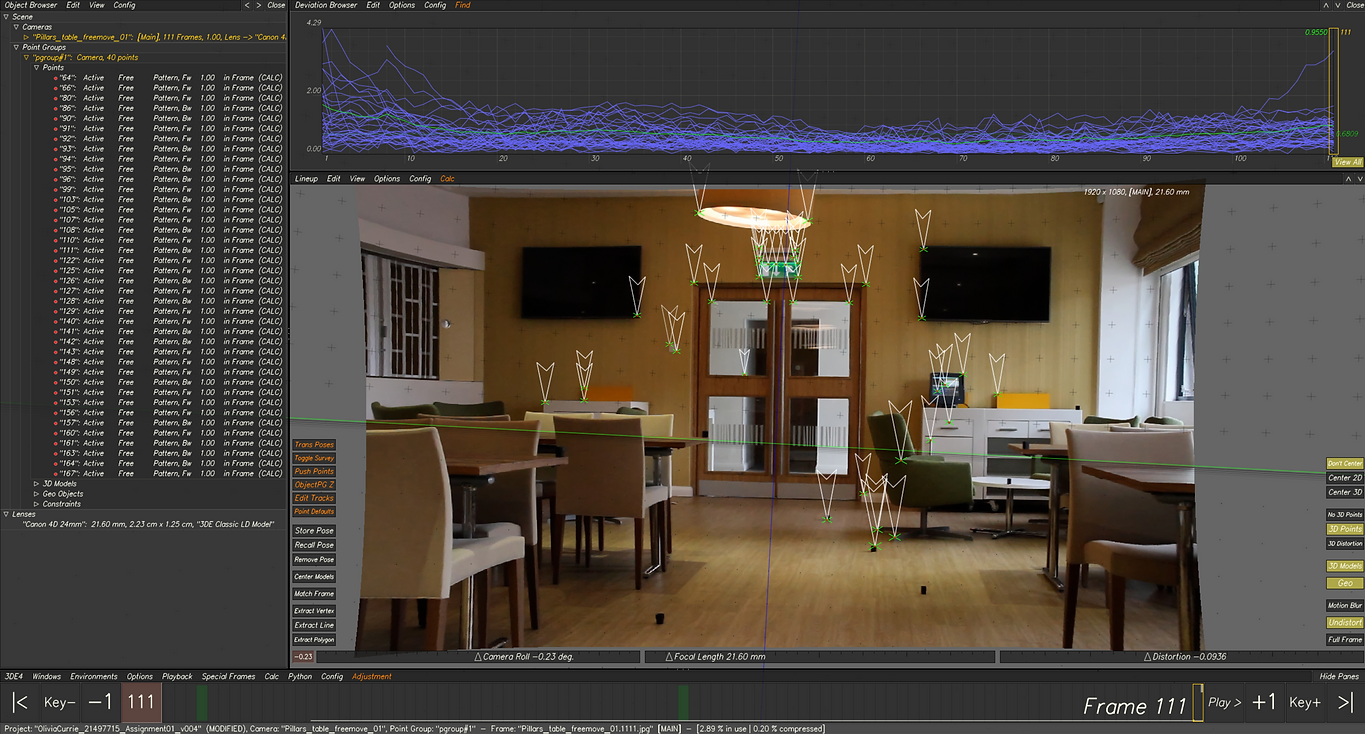
3D Object
Finally I added in my 3D object, a cube. I placed this on the floor of the scene by snapping it to one of the tracking points in the 3D view. This meant the box would sit more realistically on the floor of the scene. Finally I baked the scene and exported the individual data for taking into Nuke.
Nuke
I then took all the camera, tracking, locators, distortion and 3D object data into Nuke from 3DE. I placed them to the side of my script so that I could copy and paste them where needed. I started by undistorting the scene. I then applied my clean up to remove the fire exit sign using roto techniques. I added the undistorted data as well as the locators and 3D object and merged them with the cleanup data. Finally I re-distorted the scene before exporting the final render.
Final Nuke Script:

Final Scene:
Week 8
Lens Distortion and Grids
In this class we use the below footage to see what the lens distortion actually does. Starting by tracking the scene as shown.


The lens distortion data will help align the tracking markers with the point tracked, the red dot positioned in the center of the green X. Distortion effects the edges of an image or clip to make the images look less flat and more curved like the eye.
Then we used the grid method of applying distortion as shown below.
Lining up the Grid 
Increasing Grid Size
Calculating Distortion
Before Distortion
After Distortion
Week 9
Dynamic Lenses
The clip used had a zoom in and out camera movement and therefore requires more accurate lens data to track and calculate the data. I did this using the curve editor shown below.

After using the curve editor I then used the classic frame by frame to increase the accuracy even more on the clip. To do this first I needed to add more tracks to the scene. Then use the frame by frame with distortion and quartic distortion on.
Week 10
Nuke to Maya Pipeline
First export the 3DE mel script to Maya as well as the lens distortion node to Nuke. Then in Nuke bring in the original footage with correct project settings. Add an overscan with a black-outside. Then bring in the lens distortion node from 3DE into nuke. The a reformat node and change from format to scale, 1.1. Resize set to none. Then write the over-scanned footage out. Render as jpg sequence.
Change framerate in Maya before importing footage. Bring in Mel script exported from 3DE earlier. Panels-Perspective-Camera. Bring in the image sequence exported from Nuke. Use image sequence. Tracks not lining up properly so need to adjust filmback play and camera. Click image plane type =(number)*1.1. This sizes up the image sequence. Number to times by maya change depending on footage. Change the film back aperture the same way. Then trackers should line up correctly.
Create floor plane, assign new material, AiShadowMat. This will catch shadows in the scene. Then place 3D objects and build up scene. Add lighting however needed, turn off normalize. Scene should now render with Arnold. Make sure to switch off image plane and merge AOVs in render settings before final rendering.
Then jump back into Nuke to bring in the 3D footage from Maya. Bring in exr sequence. Merge to script after reformat node on the undistorted footage. Then apply any cleanup to footage. Apply lens distortion and change back to distort again. Then reformate again, resize to None and To Format. This would then be ready to render out as scene with 3D object placed in.


Week 11
Maya Megascan Nuke Pipeline
Following same process as learned last week we experimented with applying 3D assets from Quixel Megascans in preparation for Assignment 02.
Maya Render with Background and 3D assets
Render in Maya no Image Plane
Nuke Script

Grading

Final Image in Nuke
Assignment 02
First I started by using the green screen studio to film my clip. I chose the black background because; I wanted my scene to be dark and atmospheric so black would work better and black would require no key-lighting later on streamlining my workflow. I chose to move across the scene slowly to try minimize as much camera shake as possible whilst still keeping the hand filmed look.
I applied tracking markers to the back and side walls as well as the floor. I didn’t use too many to reduce clean-up plus I felt the scene wouldn’t need too many tracker. The ones on the wall were red to stand out against the black, but for the floor I used blue so they would not need removed later on. The number of trackers worked really well in the next stage in 3D Equalizer.
I then took the filmed footage into 3DE to start tracking the scene. I input all the correct lens data and applied the trackers to the scene. Below is the final deviation number of 0.7. 
Once the scene was all tracked I placed a 3D cube in the scene to check the trackers worked well, as shown below. The tracking points can also be seen below covering all the main areas of the scene. 
Once tracked I took the footage into Nuke to make the lens distortion data. I then took this footage into Maya to start building my scene using Megascans assets.
Before Clean-up
After Clean-up
I wanted to make a scene inspired by the game “The Last of Us”. For this I placed a rusted table and chair surrounding by foliage growing inside just like the plant life taking over buildings in the game. I wanted to keep the scene relatively simple to still show the tracking and clean-up work done.
3D Scene
I also sculpted a “Clicker” (a fungal infected human from the game) in Zbrush to add to my scene. I sculpted in Zbrush and textured with Zbrush’s polypaint. I then rigged the character in Maya and applied motion capture data to animated it to walk similar to a zombie. I thought this would bring the scene to life and bring everything together nicely.
Sculpt
Texture
Rigging and Applying Mocap
After making sure the scene and animation all worked in Maya and after testing still images in Nuke I finally rendered the scene from Maya ready to grade in Nuke.
I used grade nodes to make the scene darker, to increase colour burn and focus the lighting onto the creature. I then applied a grain over the scene to make the creature and 3D assets look less sharp in the scene. Finally I applied some slight fog/smoke using the noise node to create subtle atmospheric smoke.
First Grade
Second Grade with Noise
Final Render
Reflection:
Overall the scene came together really well and close to how I envisioned it. I like the mega-scans assets I chose, I think they worked well in the scene. I think the tracking went really smoothly and the final scene composited nicely together. If I were to do this again I would change a few things that I think could be improved upon reviewing. Firstly, I would apply another light source coming from the light filmed on set in the top left as I forgot to apply light from that direction. Secondly, I would fix the painting weights on the creature to remove the stretching under the arms when animating which I didn’t have the time to do. But I was happy with how the project came out creatively.
