WEEK 1
Retopology in Maya
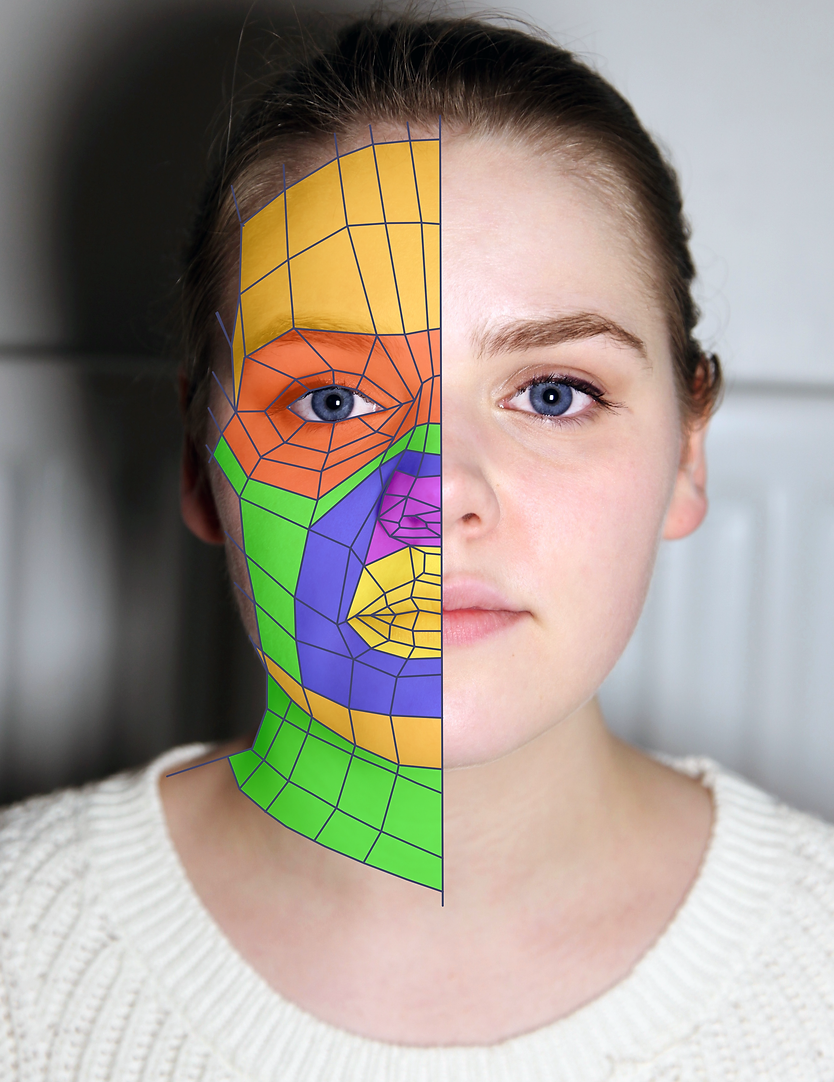
This week we looked at face topology in Maya using Quad Draw. Below I used this reference image to plot out where the quads would be on the model. I used a reference photo of a female face to practice the Quad Draw topology on. Creating loops around the eyes and mouth are very important because this is where the most movement happens on the face, this way when rigging it is easier is animate.


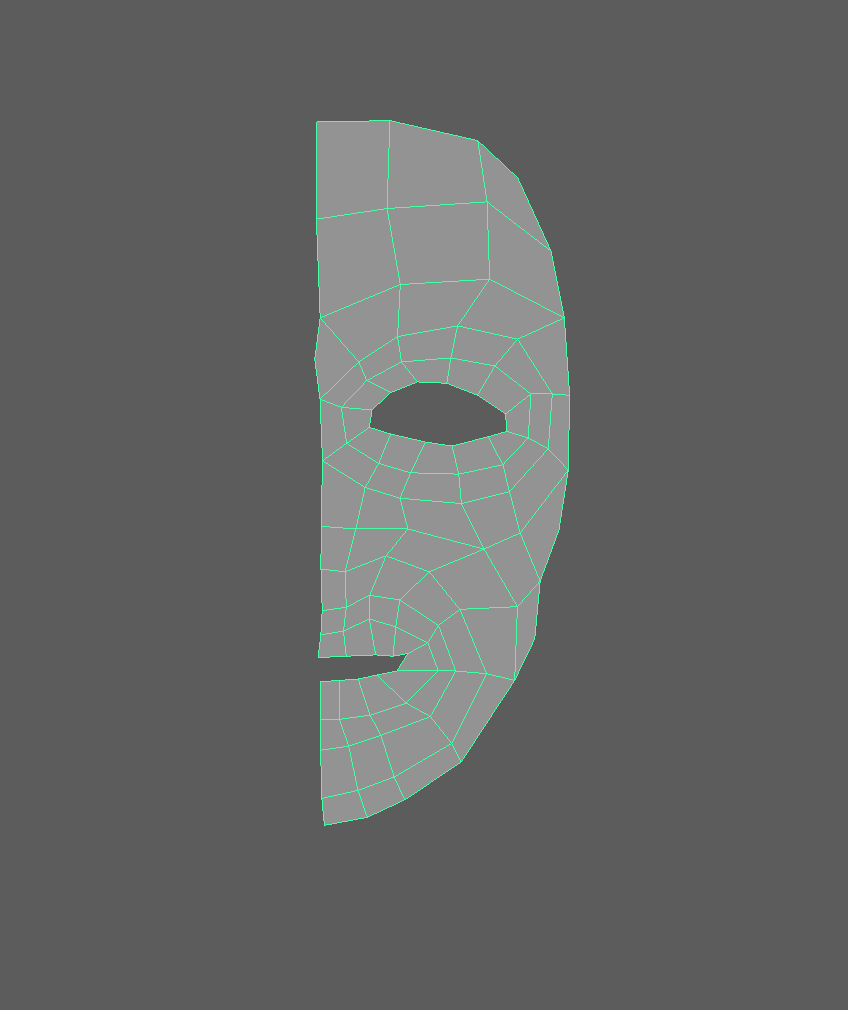

I used the Pull tool to move the vertices around to give the mask more shape particularly around the mouth and eyes. I then mirrored the section I had done the Quad Draw on to the other side of the face to make a complete mask as seen above.
WEEK 2
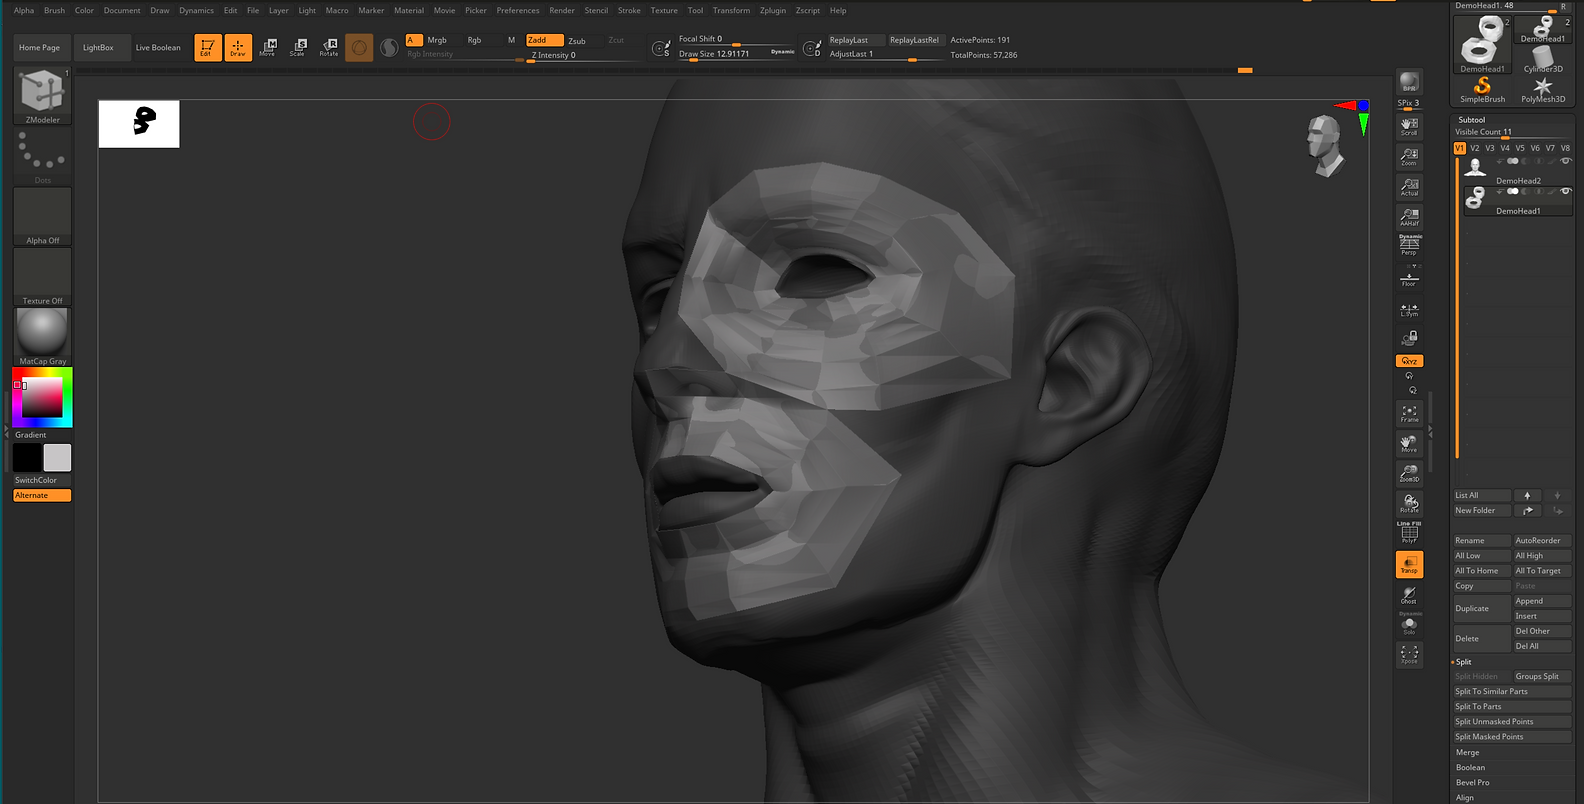
Retopology in ZBrush
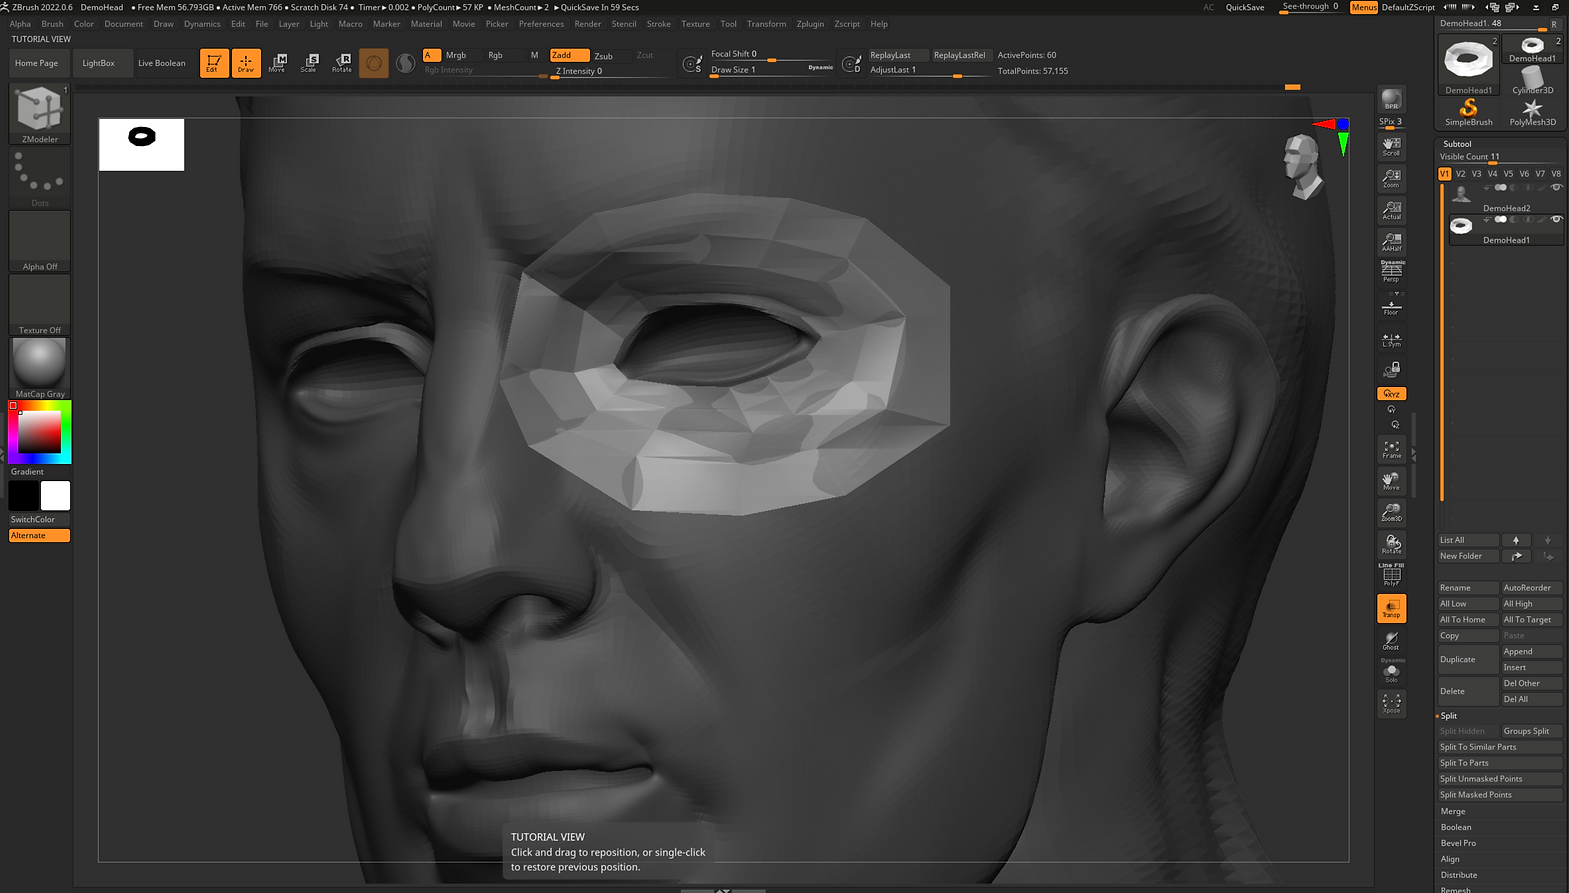
Here we used ZBrush to topologise instead of Maya to see another way of doing it. Here we used ZModeller to approach this. This allowed me to draw on the quads in loops around the eyes and mouth as before just using a different software, for if I wanted to retopologise after modelling in ZBrush.
Creating the Eye Loops


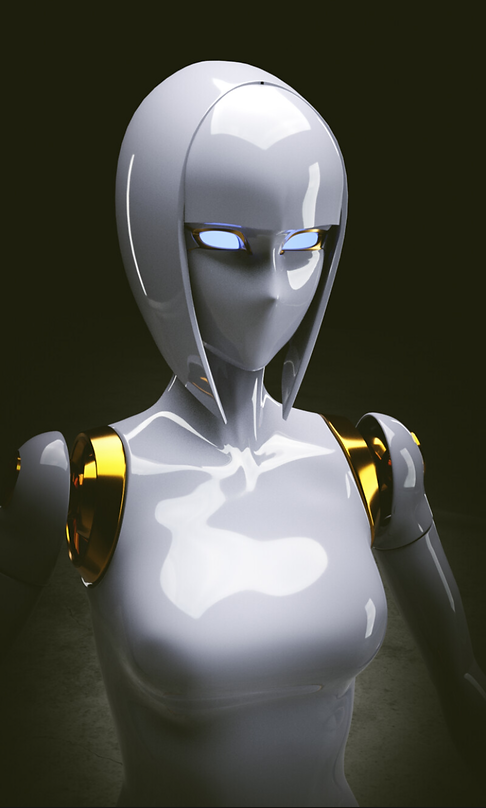
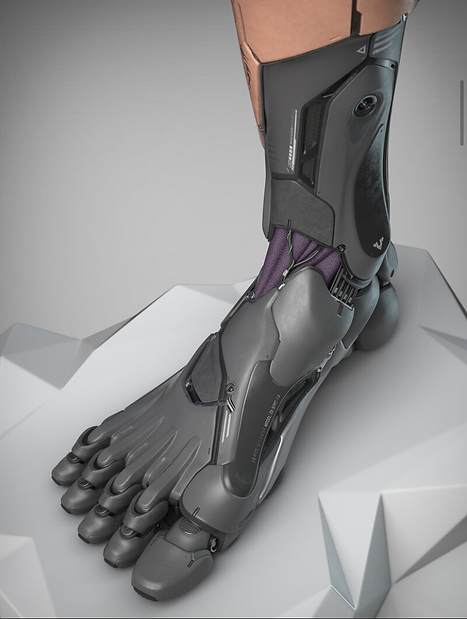
References for the Mech/Robot Character
Below is my inspiration board for the Mech character design for Assignment 1 and 2. I think I will create a character that is very humanoid to capture more emotion in its gestures.
Reference’s from Artists:
Frederic Daoust, Fede Monodino, Kei Morita, Hideyuki Ashizawa, Mykola Holyutyak.


Mo-Cap Scene Ideas:
1. Seeing something and trying to summon others attention. Pointing, gesturing to something in front or in the distance, looking around for others seeing it, big dramatic gestures.
2. Mock fainting, stumbling, having to sit down, getting flustered, hand to forehead, fanning themselves after maybe viewing something or being in the heat.
3. seeing something shocking or horrifying, hands to sides of the face, backing away slowly, stumbling slightly.
4. Walking and hearing a loud noise, ducking, hands over the ears, looking around in confusion.
WEEK 3
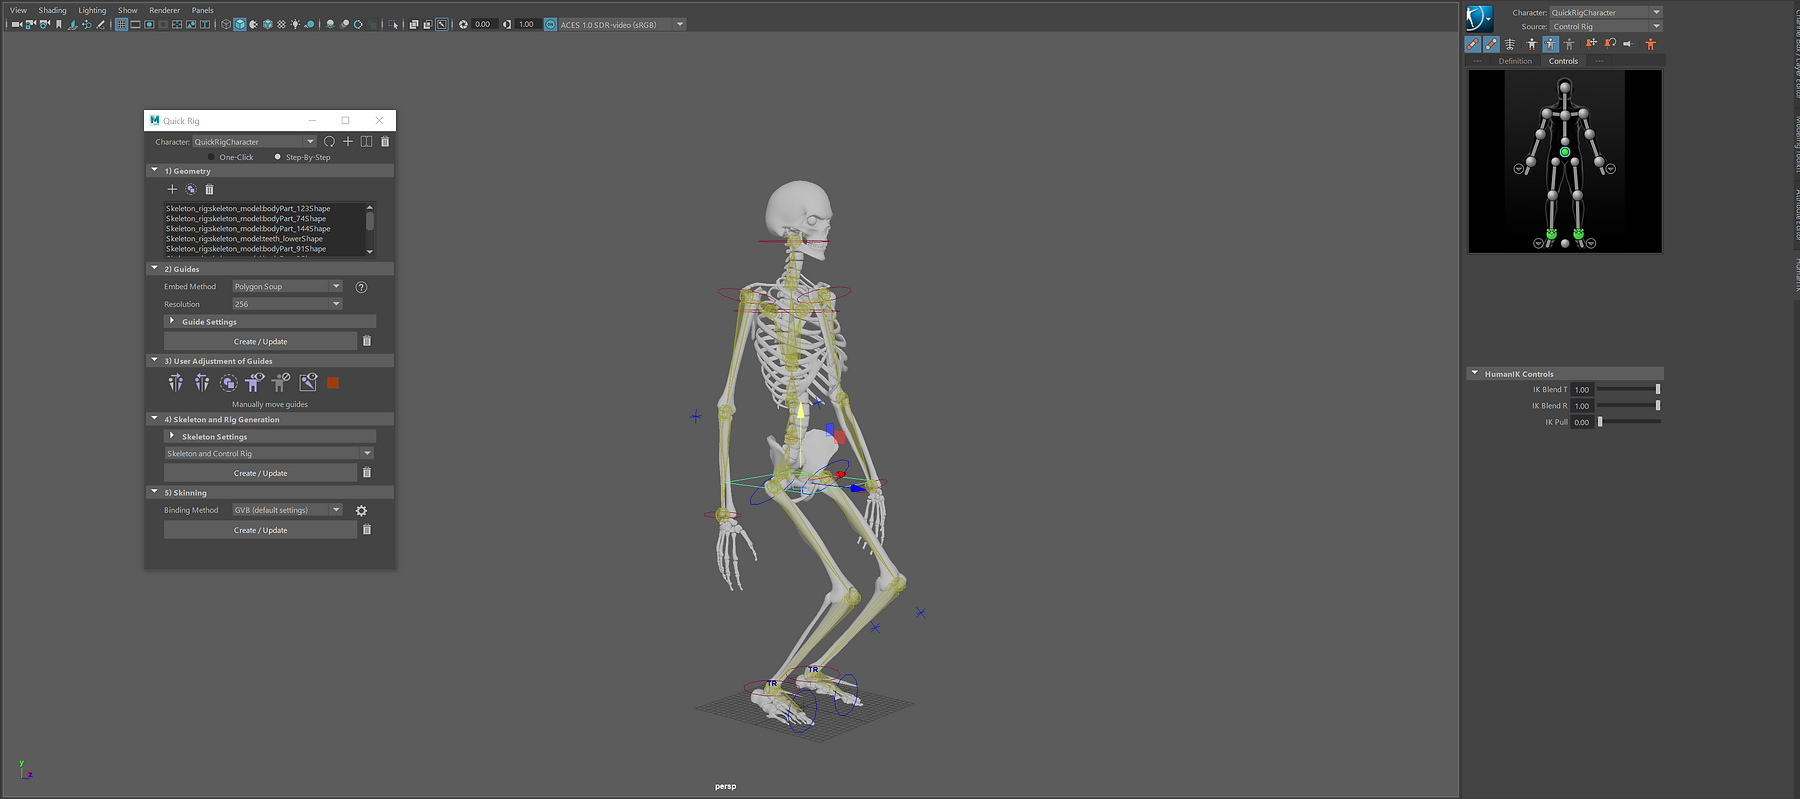
Rigging a Skeleton
Applying the Rig:

Skinning:
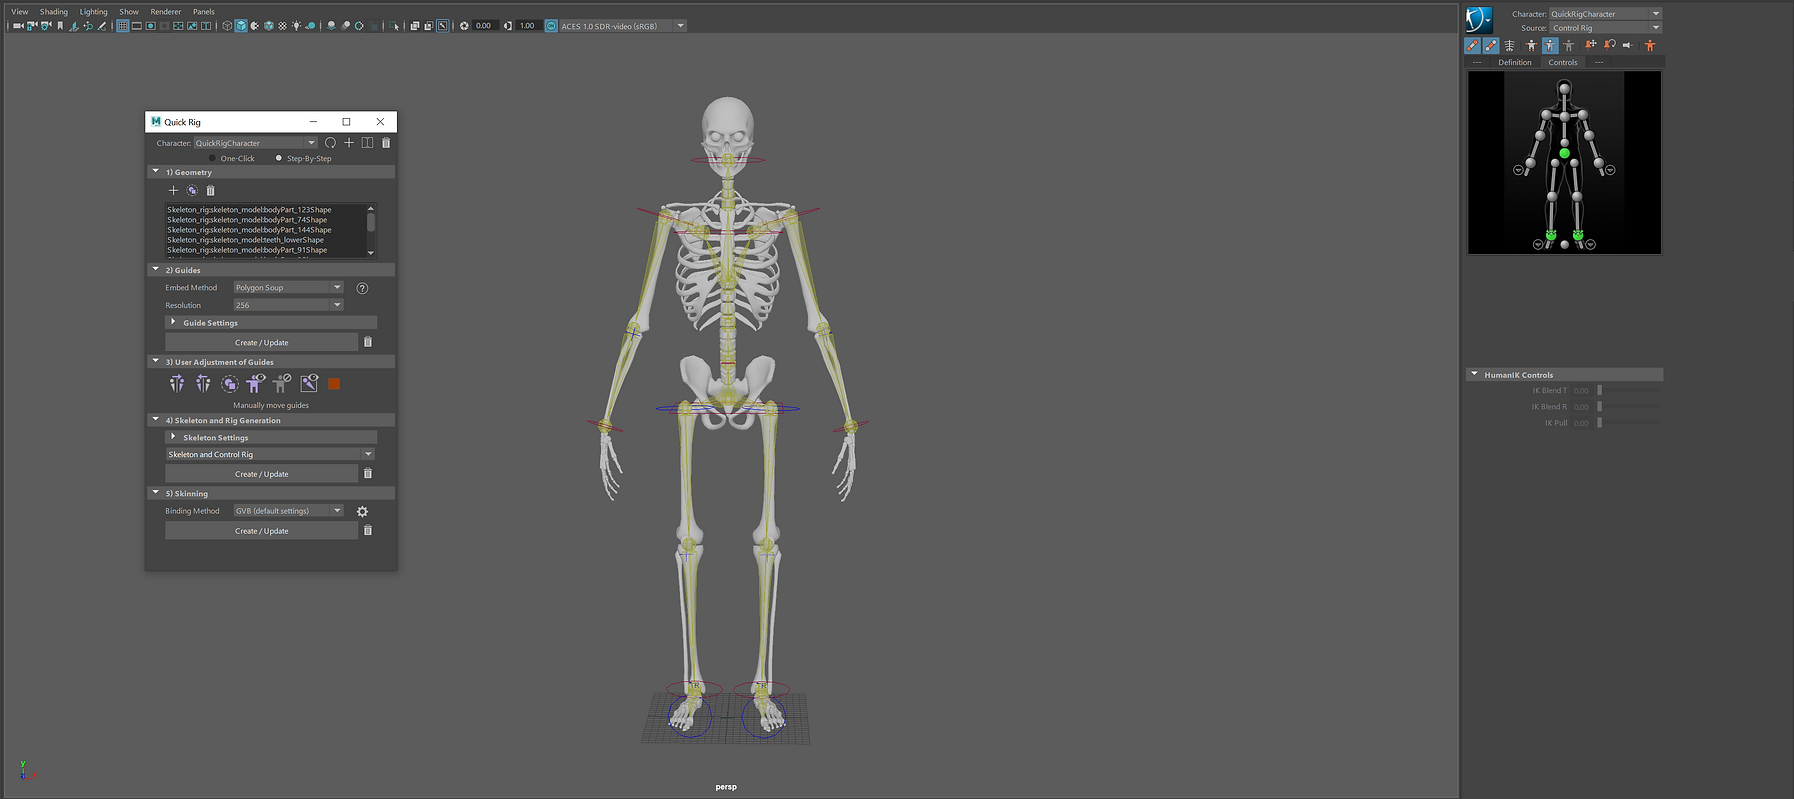
Making the Rig Move:
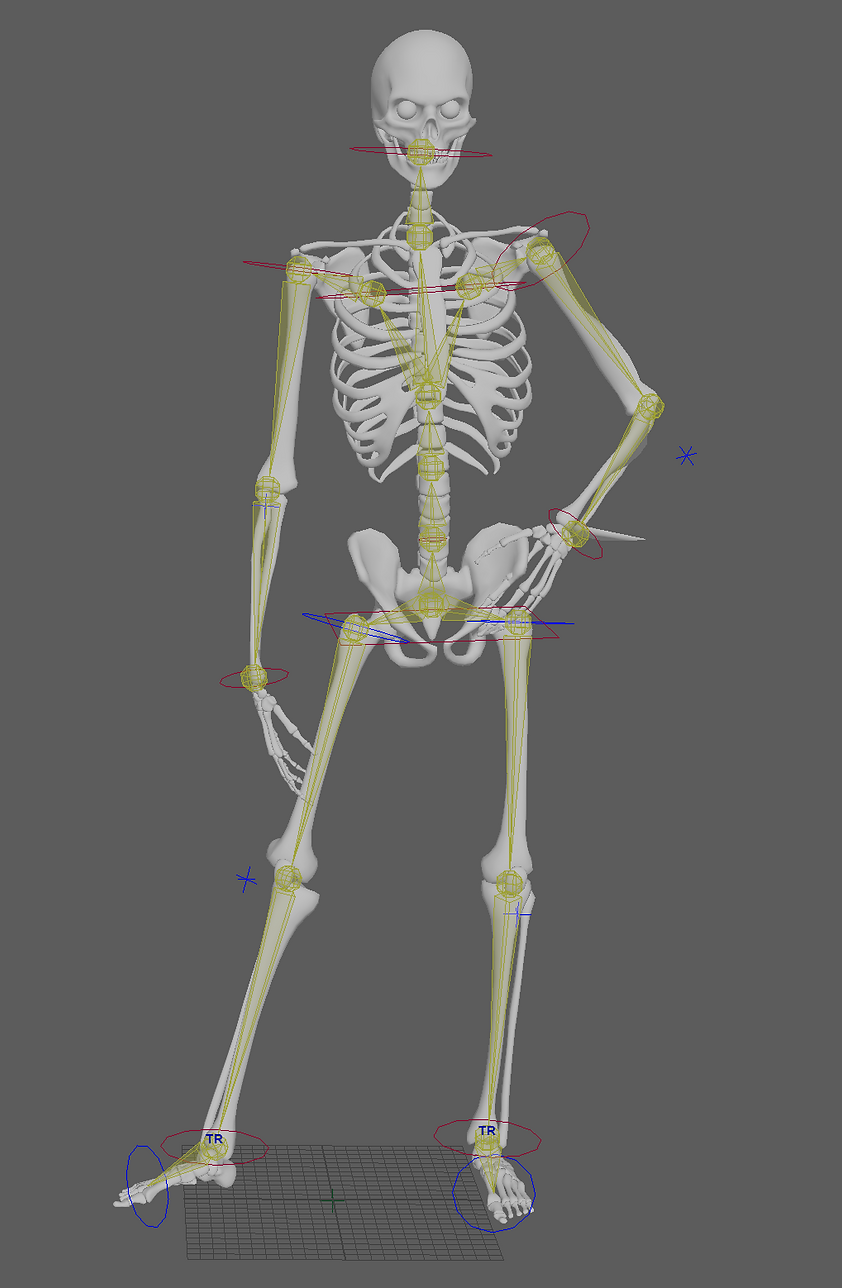
Simple Dynamic Poses:


WEEK 4
Applying Mocap
This week I tested some of our recorded mocap data onto a skeleton rig in Maya. Below is the result of the test in a quick playblast.
WEEK 5
Hard Surface Modelling
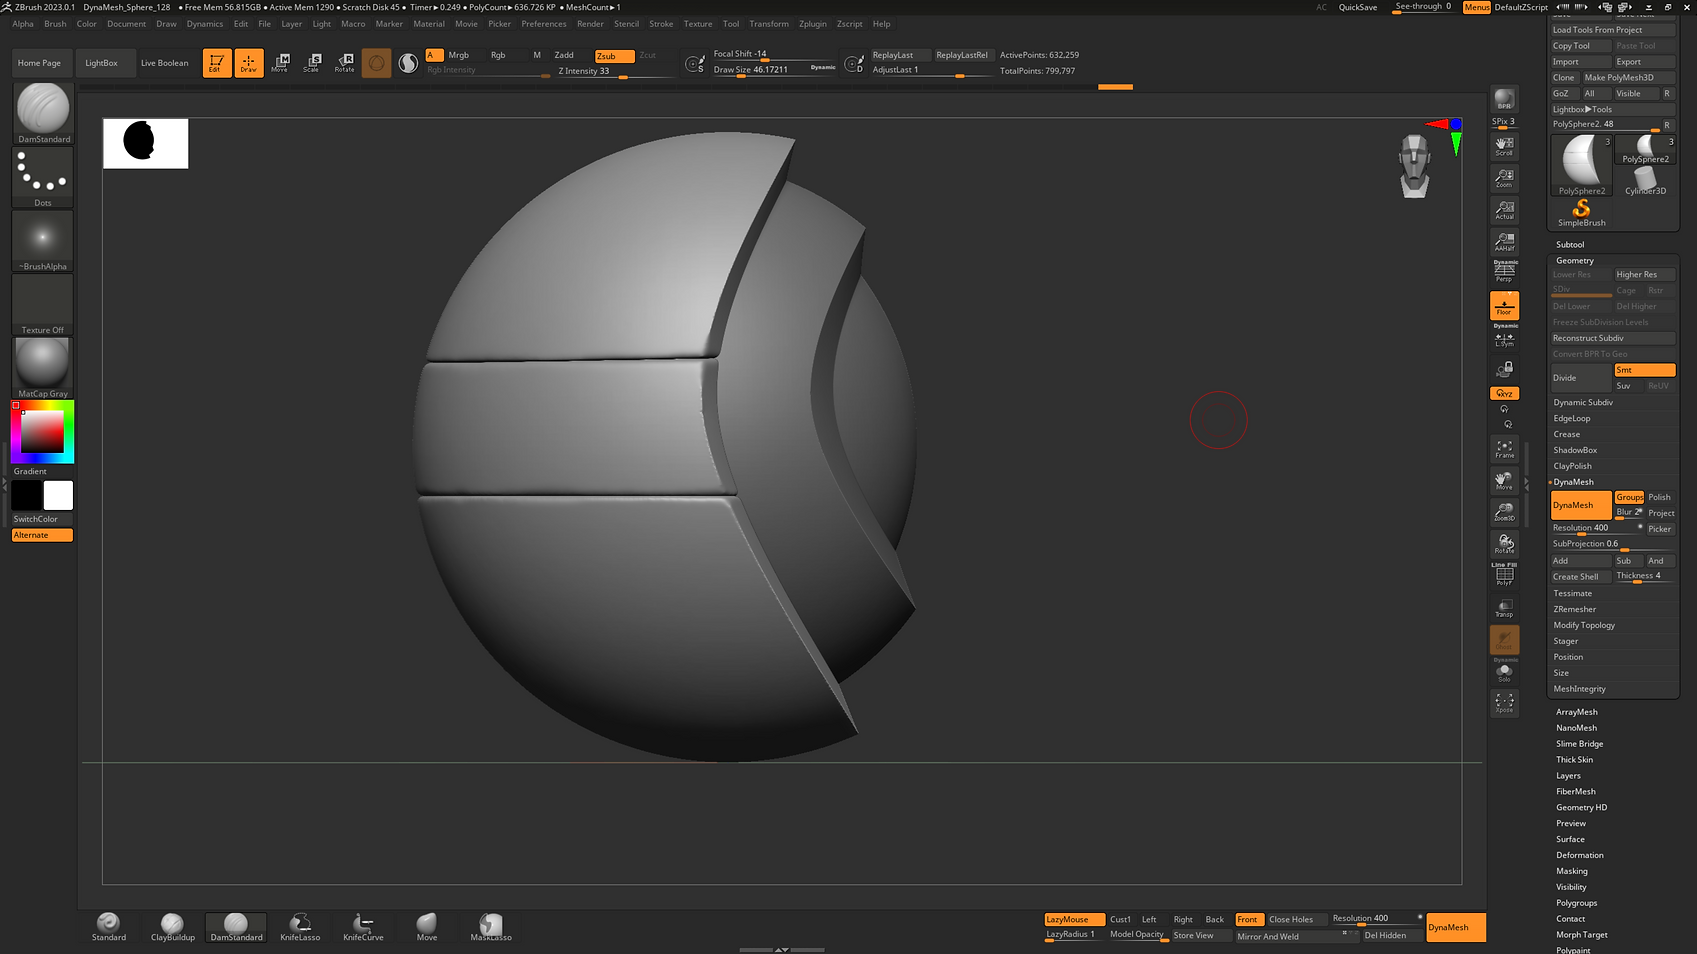
This week we looked at the different Trim and Knife bushes and how to us them to make a simple spherical robot thing. Below are the process shots of the different brushes being used.
The TrimCurve Brush
.png)
Splitting the Mesh and Smoothing Lines
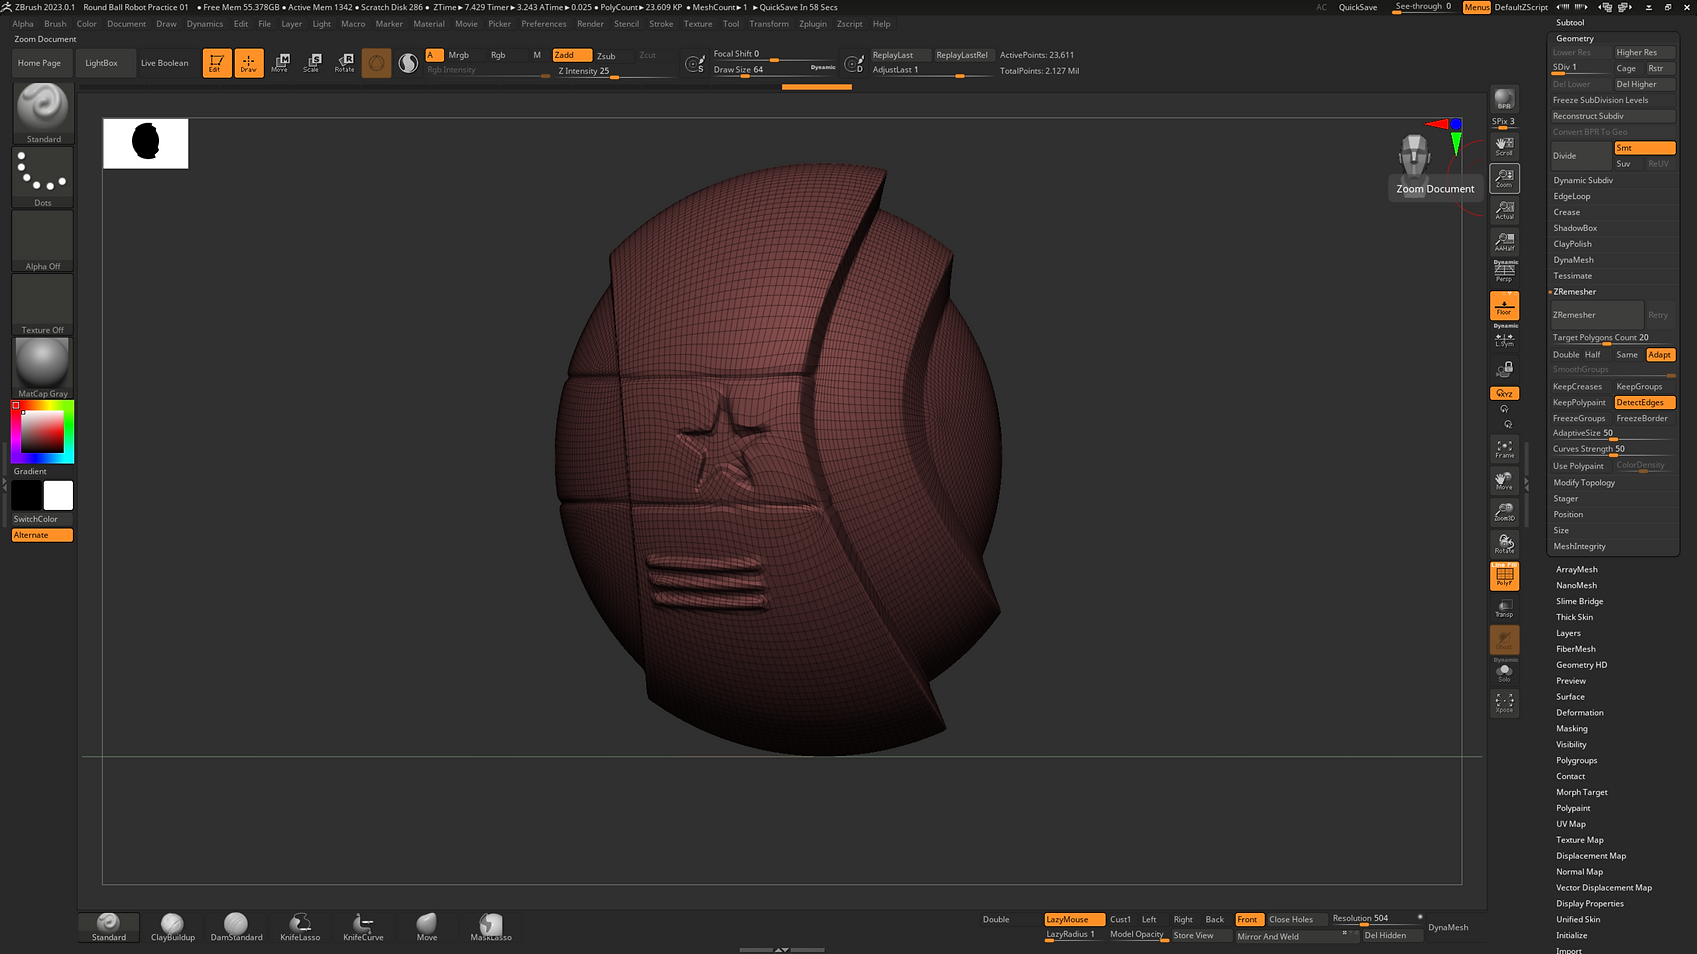
Using an Alpha

Second Alpha

WEEK 6
UVing Recap and Zbrush to Maya Pipeline
This week I looked at UV unwrapping in Zbrush. To start I duplicated the model and renamed it ‘lowpoly’ I then Zremeshed to around 20,000 polys. I subdivided the lowpoly model to match the original and then projected the original onto the lowpoly. I then used UV master to unwrap the model for texturing.
ZRemeshed version
.png)
UV unwrapped version
I then played around with texturing using the different paint tools and brushes.
Textured Model (Paint)

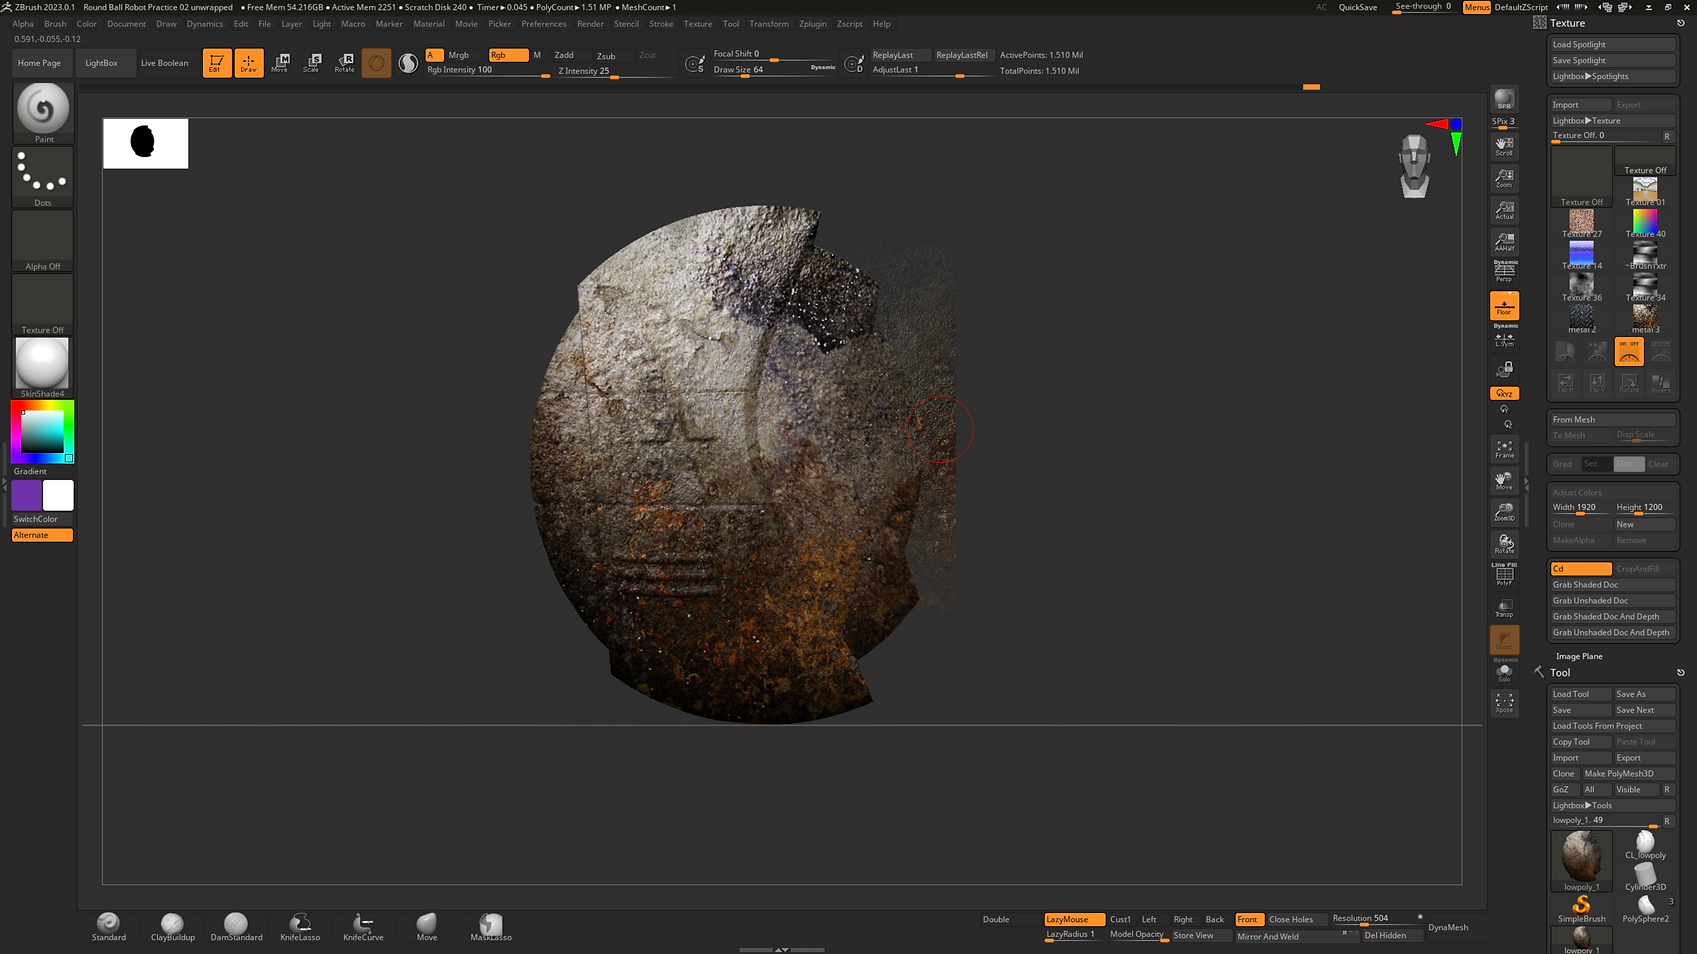
Finally I used the spotlight tool to apply different metal textures in a different way. As seen below.
Spotlight Texture


Assignment 01
Part 1:
Machinarium Robot Character

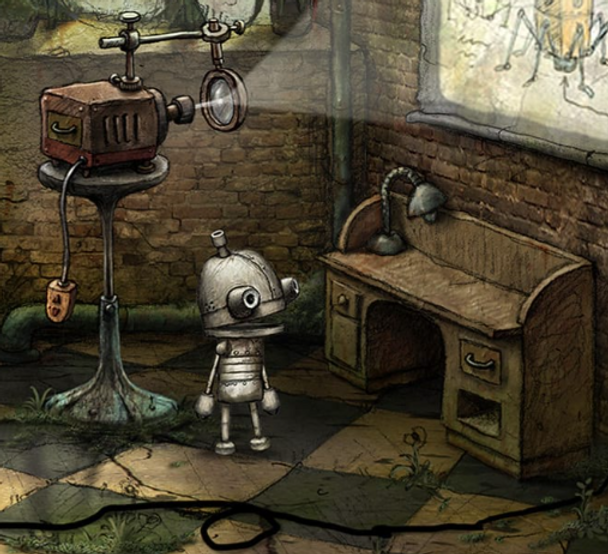

My reference is from the robot adventure game ‘Machinarium’ which features a small stylized metal robot.
I will be changing the design slightly to fit the motion capture data better by adding spheres where the elbow and knee joints would be as well as changing the texturing to make it more realistic and detailed.
Maya
Base model:
This was the first version of the model that was made in Maya using basic geometry. I then added an AiStandard Surface material to see how the model would look with some texture on.

Rendered Image of Model with standard material:

I then changed a few parts such as adding feet to the model so that when rigged a better sense of weight would be achieved. I took away the bolt as I realised it would be simpler to add them in Substance Painter later. I also made the funnel on the head looked chipped adding an edge loop to remove a small section to add to the worn look I wanted to achieve in Substance.
Substance Painter
Base Colour added:
Here I choose the bases colours of orange and teal as I thought the colours complimented each other well. I then added a rust layer around the edges.


Dirt and Colour Shift:
I then added a colour shift layer to make the colour look more faded at the top of the head, and gradually become less faded the further down the body. I also added a dirt layer over the whole model using black mask.


Hard Surface and Lettering:
Here I used the Alphas to apply some hard surface details such as vents, latches and bolts. I then applied lettering for the name and number of the robot using a text alpha.


Final Layers:

Back in Maya
Rigging:
Here I used the quick rig system in Maya to rig the model ready for posing. I flooded all the parts of the robot so that only the knees and elbows bend.


Dynamic Pose References:
I used a selection of these reference poses for posing my model.


Final Dynamic Poses:


Week 9
Camera Animation in Maya
This week we practiced some basic camera animations in Maya. Below is the playblast of the animation moving along the city street, cutting and then going into a birds-eye view.
I also used the curve constraint to create a path for the camera to follow and edited the vertices for how I wanted the camera to be keyed. I then used the graph editor to change the speed of the animation. See below.
Finally I tried the camera and aim function to create a panorama of the city scene. See below.
Week 10
This week I planned out my animatic scene. I used Megascans assets to build a roadside/middle of nowhere scene for the robot to be placed into. I wanted to keep the scene simple and light to keep the robot animation as the focal point. The idea is to have to character see something in the distance whilst being lost in a deserted area.


Week 11
Feedback Session.
Assignment 02
For Assignment 02 I changed my idea from the environment done in Week 10. I decided to use different mocap data and create a boxing scene where the robot is jogging round the ring in warm up before a fight. I changed my idea because I felt the new plan had more of a story behind it than the previous idea.
I used my robot created in Assignment 01 and applied the motion captured filming in the studio using the quick rig in Maya. I then paired the mocap animation to the robot rig.

I build the scene using assets from Turbosquid and Quixel Megascans. I used 4K assets to build a boxing ring, weights, bench, poster and banner. I didn’t want to over-do the scene as I knew it would increase render time and my project was already quite large. 
I then applied lighting starting with some area lights for ambience which I placed around the outside of the boxing ring. I then used a spotlight to illuminate the robot and ring. I also animated the light using key frames to follow the robot as it moved around the ring. I though this had a really cool effect as if the robot was the highlighted event. I kept the lights hue a warm white to match the red tones in the scene. I then animated my camera movement which I positioned outside the ring. I wanted to capture the scene and the robot animation equally and this the best way to do this. I kept the movement relatively slow except a few slightly fast motions when the robot moves quicker to match the pace.

Final Animation