
━━━━━━━━━━━━━━━━━━━━━━━━━━━━━━━━━━━━━━
Assignment 1 – Cleanup & Rotoscoping
For Assignment 1, we were provided with sample footage and tasked with performing cleanup and rotoscoping to refine the scene and prepare it for compositing.
Final Result:
Final script:

Node Graph

Node graph – Keying & Tracker Removal

Node Graph – TV Screen & Logo Removal
My approach:
Keying
First, I started with the Read node to import the footage with the green screen.
Next, I added a Denoise node to clean up any noise in the footage. This step made the green screen more consistent in color and tone, which helped achieve a clean key.
Then, I used the Keylight1 node to key out the green screen. This removed the green background and created an alpha channel. To refine the key, I used options like Colour Dilation and adjusted the parameters to clean up the edges.
To assist with the keying process, I added a Constant1 node filled with a solid green color, matching the green screen in the shot. This acted as a reference to ensure the keying was precise. I merged this with the footage using the Merge2 node (set to “from”).
To smooth out the edges of the keyed footage and prevent sharp transitions, I applied a Blur node.
Next, I used a second Keylight2 node to further refine the key. This step helped eliminate any remaining green spill or improve transparency in problematic areas.
For the replacement background, I added a Constant2 node, which was a solid blue color. I reformatted it using the Reformat1 node to ensure it matched the resolution and aspect ratio of the keyed footage.
To composite everything together, I used several Merge nodes.
I also included Saturation1 and Saturation2 nodes to fine-tune the colors in the keyed footage and composited elements. Finally, I used a Grade node to match the brightness, contrast, and overall tones between the subject and the blue background, ensuring the final result looked seamless.
The result was a cleanly keyed subject, with the original green screen replaced by a smooth blue background from Constant2.
Tracker Removal
First, I selected frame 1104 because it clearly shows all the trackers. Based on this frame, I used the RotoPaint node to copy areas without trackers and cover the trackers with the cloned regions.
Next, I applied a FrameHold node to hold everything in place, freezing the modifications at frame 1104.
However, after using the FrameHold node, the entire video displayed only the frozen frame. To resolve this, I used a Copy node. I connected the FrameHold output to the B pipe, and to the A pipe, I connected a Roto node.
With this Roto node, I rotoscoped around the removed markers and applied a blur to create a smooth transition between the modified and unmodified areas.
Lastly, I created two additional Roto nodes to isolate and animate the character’s head and upper body. I roughly animated both rotos to follow the character’s movement throughout the clip, ensuring that the previous roto work didn’t interfere with or cut into the character’s shape.
TV Screen Replacement
First, I added the Color Bars node to serve as a replacement for the current TV screen. I positioned it using the Reformat, CornerPin 2D, and Transform nodes, then merged it into the composition using the Merge node (set to “Plus”) through the B pipe.
However, this initial approach had an issue: when the man walked in front of the screen, the color bars appeared over his face, making it obvious that the effect was added.
To resolve this, I added two roto nodes—one for the upper body and one for the head. I carefully animated them to follow his movement. I feathered the edges of the rotos slightly and applied a blur to help remove as much of the background as possible, creating a more seamless and natural appearance.
Logo Removal
First, I added a Roto node and roughly selected a square around the logo. Using the techniques we learned in the planar tracking lecture, I tracked this shape by right-clicking on it and selecting Planar Track This Shape Forward, which allowed the shape to be tracked frame by frame. Afterwards, I clicked CornerPin2D (Relative, Baked) to extract the tracking data. At this point, I disconnected the Roto node from the video, as it was no longer needed.
Next, I added a RotoPaint node and used the Clone Tool to remove the logo, similar to how I removed trackers earlier. I then added a FrameHold node, setting it to frame 1020 as my reference frame for further adjustments. However, this caused the entire video to freeze on frame 1020.
To fix this issue, I added a Copy node. I connected the FrameHold output to the B pipe and added a new Roto node to the A pipe, limiting the effect to only the rotoscoped area.
During the process, I noticed slight color differences between the roto-modified areas and the original footage. To address this, I created a thin Roto shape around the original footage above the logo and another around the roto-modified area. I then used Grade nodes on both to match the colors and shades and blend seamlessly with the surrounding footage.
I also observed that the shadows around the logo moved differently as the subject moved. To account for this, I added another Roto node to isolate the lighter area of the bag. Using a Grade node, I keyed the adjustments to mimic the changing light and shadows, ensuring a more natural integration throughout the scene.
Assignment 2 – Compositing
For my Assignment 2, I chose to create a scene inspired by the movie The Martian.
━━━━━━━━━━━━━━━━━━━━━━━━━━━━━━━━━━━━━━
Week 1 – Introduction to Nuke
What is compositing?
Compositing in VFX is the process of combining multiple visual elements from different sources into a single image or sequence, creating the illusion that all elements exist in the same environment or were recorded by the same camera. These elements could include live-action footage, CGI, matte paintings, or background plates.
The goal of compositing is to seamlessly integrate all these elements, matching lighting, color, and perspective to create a believable scene.
Key techniques used in compositing include:
- Green/Blue Screen (Chroma Keying): Removing a solid color background (usually green or blue) from live-action footage so another element can be placed behind it.
- Rotoscoping: Manually creating a matte or mask to isolate an element in the scene, allowing for greater control over what to composite.
- Tracking: Matching the movement of the camera in live-action footage to CG elements, so they blend seamlessly into the scene.
- Color Grading: Adjusting the colors of different elements to ensure they all match and appear as part of the same scene.
- Layering and Blending: Combining various layers such as foreground, background, effects, and other elements, adjusting transparency and blend modes to create the final composition.


What is Nuke used for?
Nuke is a powerful node-based compositing software widely used in the film, television, and visual effects (VFX) industries. Developed by Foundry, it is known for its advanced capabilities in creating high-quality visual effects and is considered an industry standard for professional compositing.
Key features of Nuke:
- Node-Based Workflow: Unlike layer-based compositing software (such as After Effects), Nuke uses a node-based structure. Each node represents a specific operation or effect (such as color correction, masking, or transformations). This makes it easier to manage complex compositing projects and allows for non-linear and more flexible workflows.
- 3D Compositing Environment: Nuke has a full 3D workspace that allows artists to import 3D models, camera data, and create 3D scenes directly inside the software. This is essential for integrating CGI with live-action footage, enabling realistic visual effects.
- Multi-Layer Compositing: Nuke supports multi-channel EXR files, allowing compositors to work with multiple render passes from 3D software (e.g., lighting, shadows, reflections) and fine-tune each aspect of a composite without re-rendering.
- Powerful Rotoscoping and Keying Tools: Nuke offers advanced rotoscoping (mask creation) and chroma keying tools (for green/blue screen work), which help to isolate and extract elements from live-action footage more precisely.Why Nuke is popular:
- Industry Standard: Nuke is used by leading VFX studios such as Industrial Light & Magic (ILM), Weta Digital, and Framestore. It has been used on high-profile films like Avatar, The Avengers, Star Wars, and many others.
- Scalability: Nuke’s ability to handle large-scale projects with massive amounts of data makes it suitable for blockbuster films and TV shows.
- Flexibility: With its node-based structure and deep customization options, Nuke provides a lot of creative freedom for compositors, especially on complex or high-end visual effects projects.
Compositing in Nuke
- what looks correct
- choosing which pixels to effect sample or avoid
- selecting tools and approaches to achieve the best result
- organizing materials and nuke scenes to be usable to others
- adhering to studio or industry standards
Colour correction vs collour grading
getting things to match > grade ”filter”
Neutralize things and only after that grade
Cleanup and patches – common as junior role
Remove things like backgrounds wires etc
Complex cleanup
TAB screen 3d view
tab put in node
f/h
Important Nuke Nodes & Keybinds
Blur – A node for blurring the image
Copy (K) – Used to bring extra channels into the main stream
Defocus – Used to defocus the image replicating camera defocus
Erode(filter) – Generally used to expand or contract the edge of an alpha
channel.
Frame Hold – Freezes footage on a selected frame. Used a lot for clean up patch
work
Grade (G) – for applying color correction changes
Keylight – Primary blue/green screen keying node
Keymix – A type of merge that allows you to mix two keys together through the
use of a mask..
Merge (M) – Used to composite two elements together
Premult – A multiply operation between the RGB and Alpha of an image. It
effectively cuts the image out based on the alpha channel present.
Read – A node which allows you to bring footage into Nuke
Roto (O) – Used to create a matte
Roto/Paint (P) – Used to create mattes, painting, cloning, and paint reveals
Tracker – A transform node which tracks pixel values in an image. Used to
composite elements into shot and match the movement within that shot.
Transform (T) – for changing spatial coordinates of an element
Write – This allows you to render your comp out to file.
 Assigning numbers to nodes
To assign a number to noode:
connect it to the viewer
press on the node and assign a number to it by pressing the number on the keyboard
now if you press the number it will preview the node you assigned it to
D to Disable


Keep your images as DPX
Merge Node
-
Plug the things you want to add to your scene into A
-
Plug the background into B
Fish Composition Preview

Fish Composition Script


━━━━━━━━━━━━━━━━━━━━━━━━━━━━━━━━━━━━━━
Week 2 – Organization & Rotoscoping
History of rotoscoping
Rotoscoping was pioneered by animator Max Fleischer who developed the rotoscope tool to create the animated character Koko the Clown in the early 1900s as part of his Out of the Inkwell series. Fleischer captured footage of his brother, Dave Fleischer, performing as Koko the Clown. Fleischer used the live-action footage of Koko the Clown as a reference to create the animated character. Fleischer also used this technique to make the character Popeye in 1929, Betty Boop in 1930, and the animated Superman film series in 1941.
Project directory shots (not in shots)
delete everything before //Shots
Class Excercise 1
Original Footage:
Final Result
Final Result (Premult Node On)


Class Excercise 2
Original Footage:
Final Result:
My approach:
Setting the correct file name and directory so that even if I move it to another device it’ll remain connected. It’s a practice in the industry to avoid wasting time reconnecting the files within a script.

Using the copy and roto node, I select around the roof so I can manipulate the area further.

Holding over the shape, I move it on a different frame to animate the shape as the scene moves and rotates. I try to do that with the least amount of keyframes to ensure a smooth transition and movement.
Important nodes covered in today’s lecture:
1. Roto Node:
The Roto node is used for creating hand-drawn masks or mattes, allowing you to isolate parts of the image or create animations for objects. It lets you define shapes (bezier, polygon, or spline) that can be animated frame-by-frame to track moving elements in a scene.
- Purpose:
- To isolate or mask specific areas of the image.
- To create animated masks for compositing work, such as object tracking, background replacement, or visual effects integration.
- Common use case:
- Extracting or isolating an object from the background for further processing or effects.
2. Premult Node:
The Premult node is typically used in conjunction with the Roto node. It takes an input image and a matte (usually the alpha channel) and multiplies the image by the matte to apply transparency based on the mask.
- Purpose:
- To combine a foreground image with an alpha channel (or mask), where the image will be “multiplied” by the mask to isolate the object or subject within the alpha.
- Common use case:
- After creating a roto shape, the Premult node helps to apply that mask to the image, making the subject appear cut out or isolated.
3. Grade Node:
The Grade node is used for adjusting the color, contrast, and brightness of an image. It provides a wide range of controls for modifying the luminance and chrominance (RGB values) of the input image.
- Purpose:
- To adjust the brightness, contrast, or color balance of an image.
- It allows you to remap colors, change exposure, or adjust the image’s gamma or gain.
- Common use case:
- Correcting color imbalances or adding a specific look (e.g., film emulation or stylized grading).
4. Copy Node:
The Copy node is used to combine two images by copying specific channels from one image to another. This is useful for transferring information such as alpha, color channels, or other effects from one layer to another.
- Purpose:
- To copy selected channels (e.g., RGBA, alpha) from one input image to another.
- It can be used to merge different elements of a composite without affecting other channels.
- Common use case:
- Copying an alpha channel from one image and applying it to another image, or copying a color adjustment from one layer to another.
5. Merge Node:
The Merge node is one of the core compositing tools in Nuke. It combines two images (or layers) together based on a specified operation (e.g., over, plus, multiply). The operation defines how the two layers blend or interact with each other.
-
Purpose:
- To combine images or layers with a variety of blending modes (e.g., Over, Plus, Multiply, Screen).
- It is typically used to merge foreground and background layers in compositing workflows.
-
Common use case:
-
Placing an isolated object (created with a roto) over a background or compositing multiple layers together to create a final scene.
-
━━━━━━━━━━━━━━━━━━━━━━━━━━━━━━━━━━━━━━
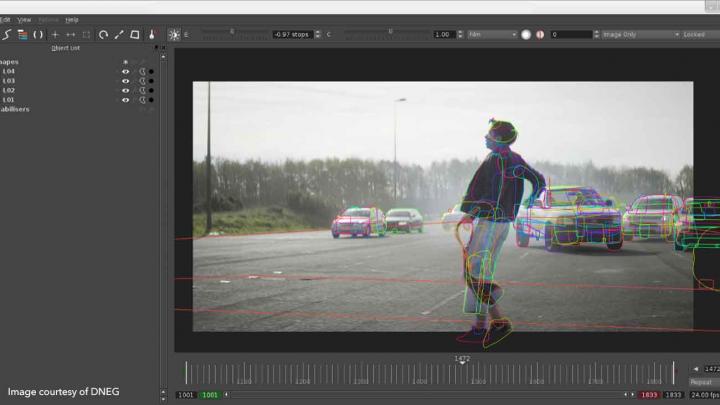
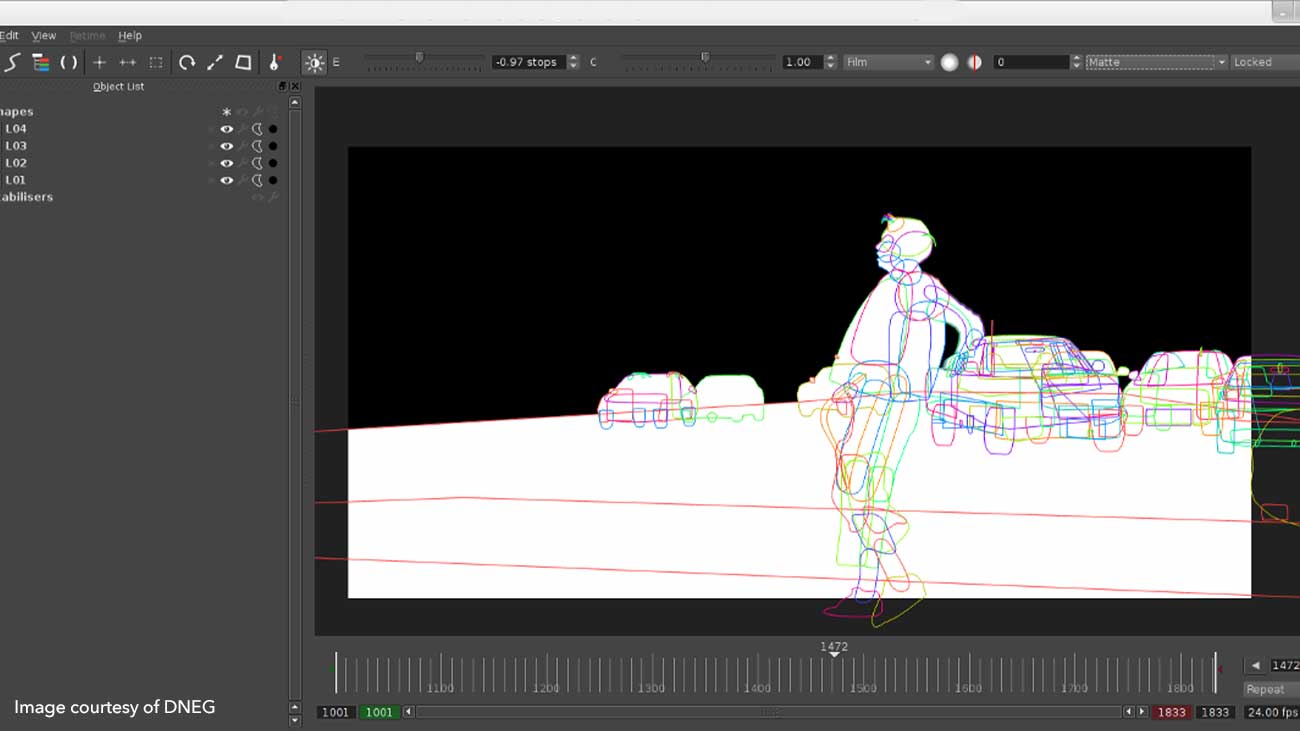
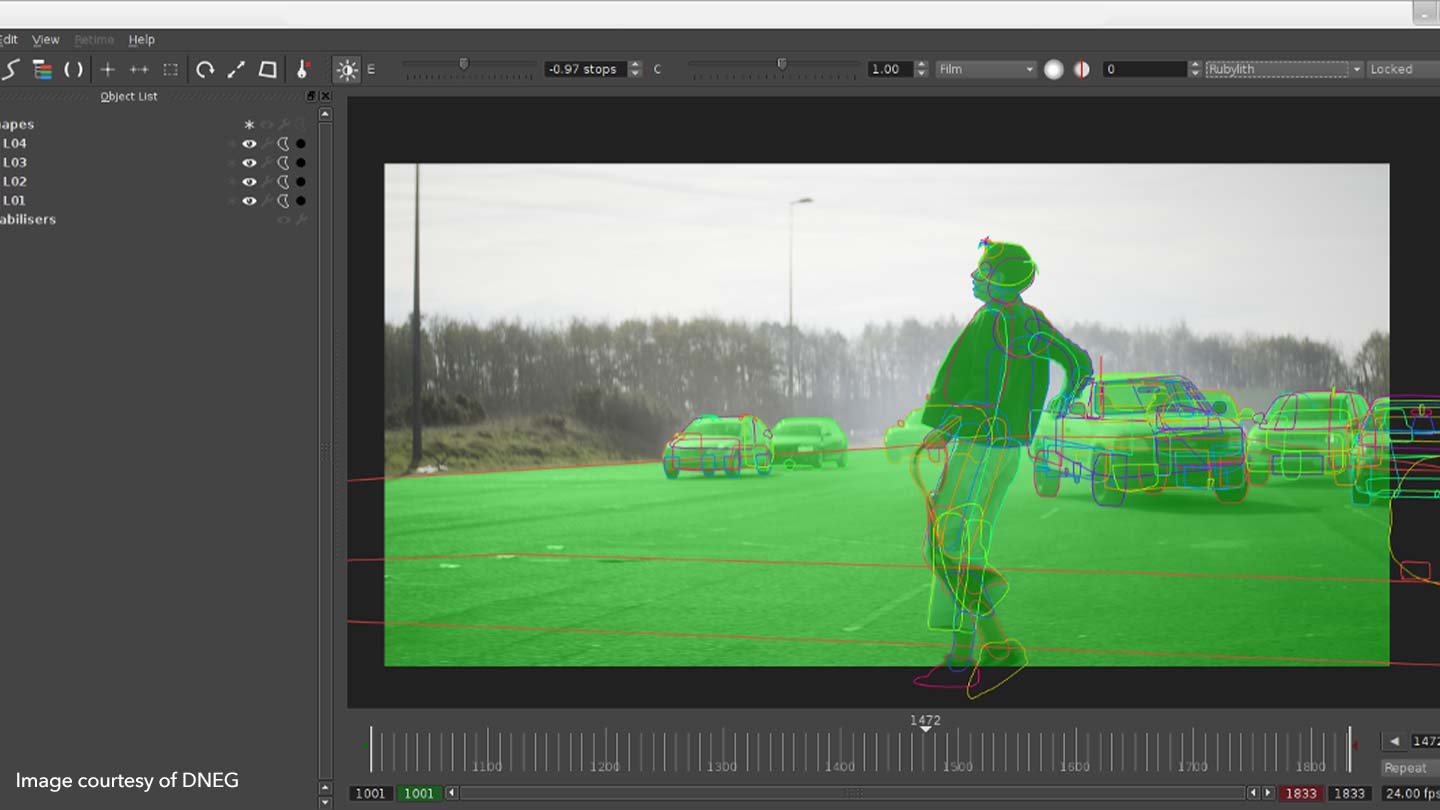
Week 3 – Complex Rotoscoping


━━━━━━━━━━━━━━━━━━━━━━━━━━━━━━━━━━━━━━
Week 4 – Keying
What is keying?
Keying is a digital technique used in visual effects and compositing to isolate specific elements within an image or video. Essentially, it allows artists to “cut out” a subject from its background, making it possible to replace or manipulate that background or integrate the subject into a different scene.
At its core, keying relies on identifying certain properties of the image, such as color or brightness, and using those properties to define what parts of the image should be kept and what should be removed. The most common form of keying is chroma keying, where a specific color (usually green or blue) is targeted because it’s distinct and often not present in human skin tones, making it easier to isolate subjects.
Keying can be used in various contexts, such as combining live-action footage with computer-generated imagery, enhancing a scene by adding visual effects, or creating a seamless blend between different elements. It’s an essential tool in filmmaking, television production, and digital media, enabling artists to create compelling visuals that tell a story in a believable way.
Ultimately, keying enhances creativity, allowing for imaginative scenarios and visuals that might not be possible in real life.
Keying in Nuke
Different Types Of Keying
-
Nukepedia – Expenencial Glow
Luminosity Keying

Bringing my footage into Nuke

Bringing my footage into Nuke

Adding the keyer node and adjusting the contrast of my image so that the sky is black which will later be transparent.

Result

Adding the copy node

Since there’s still black elements on the part of the image that I do not want to cut out, I have to roto the shape and make it white so that it doesn’t have any level of transparency in the final result.

The area that I rotoscoped.

To remove the remaining white area in the top right of my screen, I use the same technique but invert it so that it’s black.

Result after applying the roto & stencil merge.

Adding blur to my first roto so that the edges of the tree and detail isn’t too sharp and harsh when it meets the background that I imported from a different image.

At the end I also add colour dialation and light wrap nodes (intensity 0.5) so that the images blend togeher seamlessly.
Excercise 3
Final Result:

Importing my footage into the composition.

Importing my footage into the composition.

Adding the keylight node.

Final Result

Final Result

Final Node
━━━━━━━━━━━━━━━━━━━━━━━━━━━━━━━━━━━━━━
Week 5 – Colour Correction & Grading
What is colour correction?
Matching elements to the plate
compenstating the por lighting
scientific
What is colour grading?
emulating a film stock
aesthetic semiotic effect
storytelling
Colour correction vs colour grading
Blur colour of the image to 500 to see the overall colour pallet of the image
Grade Node – G
Saturation Node
Basic Colour Correction Excericise
Luminosity Correction

Black & white mode before luma correction so I see what colour ranges teh image has

I put the brightness all the way up – beforore luma correction you can still see black bits peaking through, even though everything should be fully white at that point

After luma correction (adjusted gamma and gain) everything looks more even and fitting, black levels match the black levels of the background

When I put luma all the way up now nothing peaks through and everything is white

Before

After
Tone Correction

The background still stands out quite a bit due to the tone difference of my images – the background is colder than the foreground.

To make it blend it more, I adjust the multiply value of my node and change the tone to a colder one.

Result after tone correction
Saturation Correction
Light source adjustment

Final Script

Final Result
Advanced Colour Correction Excercise
━━━━━━━━━━━━━━━━━━━━━━━━━━━━━━━━━━━━━━
Week 6 – Tracking
Object Tracking (2D)
- Track an Object or feature in the scene
- Nuke, After Effects, Mocha
Camera Tracking (3D)
- Match moving
- Track many features in the scene to solve the camera’s motion and extract 3D Data
- 3D Equalizer
Both dependant on Features
- Good featues don’t have strong lines
- dont change much
- good contrast
- dont get lost behind stuff – occluded
When tracking choose a ‘HERO frame
- least blur clearest view
- also known as reference frame
Tracking Excercise
- Add Tracker Node
2. In tracker node tracker tab;
- select the object you want to track
- press track to end
- if any issues occur; clear forwards
3. In tracker node settings tab;
- set tranform to match move
- set reference frame to one that’s clearly visible (in this case frame 1001)

Tracker Transform Settings

Final Node – Patch & Tracker

Final Result
Tracking 2 objects at the same time excercise
Planar Tracking

Importing the footage into my workspace. Ensuring all settings match the ones of the footage.

I add the roto node.

I look for a frame which has the clearest, most defined shapes.

I draw a roto shape around the object.

I highlight my shape, right click and press planar track this shape backwards.
━━━━━━━━━━━━━━━━━━━━━━━━━━━━━━━━━━━━━━
Week 7 – Cleanup & Patch Repair
RotoPaint Node
RotoPaint is a vector-based node for help with tasks like rotoscoping, rig removal, garbage matting and dustbusting. You can draw Bezier and B-Spline shapes with individual and layer group attributes, including per-point and global feather, motion blur, blending modes and individual or hierarchical 2D transformations.
The RotoPaint node gives you a broader scale of tools to use than Roto, though many of the controls are shared across both nodes. As with the Roto node, you should use the Viewer tools to create shapes and paint strokes, and then edit them using the control panel.
The toolbar on the left side of the Viewer has point selection and manipulation, and shape creation tools identical to Roto nodes. In addition, RotoPaint nodes also have brush, clone/reveal, blur, and dodge/burn tools. Click and hold or right-click on a toolbar button to open a sub-menu to select any of its available tool types. Options related to the current tool appear in a toolbar along the top of the Viewer. Click on a toolbar item to cycle through the available options for that class of tools.


Noise Excercise


━━━━━━━━━━━━━━━━━━━━━━━━━━━━━━━━━━━━━━
Week 8 – Complex Cleanup
━━━━━━━━━━━━━━━━━━━━━━━━━━━━━━━━━━━━━━
Week 9 – Key Skills Recap
Roto Node: Roto around the text, right click track forward, cornerpin – absolute baked,

 ━━━━━━━━━━━━━━━━━━━━━━━━━━━━━━━━━━━━━━
Week 10 – Advanced Keying
━━━━━━━━━━━━━━━━━━━━━━━━━━━━━━━━━━━━━━