
Methods of recording conversations using software like Skype, Zoom, FaceTime, Google Hangouts, Facebook messenger & WhatsApp Video Calls
You can record video calls with whichever devices you have at your disposal. With permission from the participant(s) the audio and/or video from these calls can be used in your work. With any of these methods, please test them out before you come to record your interview.
Best results are achieved using the desktop version of Zoom on a computer.
From the list below, choose a method based on the equipment you have.
Method 1– Highest quality, split-track audio, extra free software needed
Method 2– Lower quality, separate audio tracks possible in Zoom, easy
Method 3– Mac only, highest quality, extra software and settings needed
Method 4– Windows only, highest quality, split track audio, £170 software needed
Method 5– Skype only, lowest quality, both audio tracks are mixed, free Skype needed
Smartphone or Tablet
Method 6 – Fair quality, separate audio tracks, requires extra hardware The only realistic method for WhatsApp calls.
Method 7 – Audio only, High quality, separate audio tracks, works on Desktop and Android devices. The contributor can be on any other device (including ios).
Smartphones, Tablets or Computers
Method 8 – Microsoft Teams
Method 1: Highest quality, split-track audio, extra free software needed
You need to add your display (your computer screen) as a source:

Click on the + symbol and select Display Capture from the options:

Create a new source using the default options and hit OK:

Your new source “Display Capture” now appears in your Sources list. It can be toggled on and off by clicking the eyeball icon:

From the menu bar at the top select Edit – Advanced Audio Properties:

Set the balance for the two audio sources:
Desktop Audio – slide to the left Mic/Aux – slide to the right
Then click on “Close”

From the menu bar select File – Settings – And click the Output button on the left.
In the Recording section, make these changes. You can browse to set your preferred save location.
Recording Quality – Indistinguishable Quality, Large File Size Recording Format – mov or mp4
Encoder – Software (x264 low CPU usage preset, increases file size)

Click the Video button on the left and set Common FPS Values to 25 PAL then click OK

Collapse OBS to a smaller window by pressing the button in the top right and move the OBS window into one corner of your screen. You will see your desktop displayed in the OBS window and you will also see your Mic audio meter moving when you talk.
Try opening an audio source in your computer such as a music file or a Youtube video, you should see the Desktop Audio meter moving as well.
Make a test recording by clicking the grey “Start Recording” button in the bottom right corner of OBS. You can pause recordings but it’s probably safer to just stop them and create fresh files each time.

Make sure you know where your recordings are saved to. Find the video you just recorded and play it back.
You are now ready.
Start up your Zoom or Skype call and get it working so you can see and hear your contributor.
Ensure that you are both using the best microphone source available in your Mic options. If you are using hands-free earpieces or headsets, make sure the mic from these is the one selected for best audio quality.
Start a recording in OBS then minimise it and make Zoom or Skype full screen.
You should always make a test recording and ensure it plays back before the main recording.
Method 2: Lower quality, separate audio tracks possible in Zoom, easy
Both Zoom and Skype permit the recording of video calls from within the apps themselves. Unfortunately the video and audio is highly compressed. While this is an easy option, it should only be used if you cannot use Method 1 (screen recording method).
Important notes:
The audio from each side of the conversation is mixed together. However, Zoom offers an additional feature which lets you record each participant’s audio to a separate audio file as well. There’s nothing to lose by having this feature enabled by default.
Zoom also delivers better quality recordings overall than Skype and the framing options are much better.
Only use Skype if your contributor cannot use Zoom.
Recording a Zoom video call from within the app:
Install Zoom on your computer, sign up for a personal account or if you already have one; open Zoom and login.
To enable to best recordings go to your settings by clicking the settings icon on the Zoom home screen:

Click on the Recording settings and make the following changes.

You can change the default saving location for the recordings or you can choose to have Zoom ask for the location each time.
Here is where you set it to record separate audio tracks for each participant, and there’s also an option for making the files more edit-friendly. Keeping the temporary recording files is not a bad idea for safety.
Close the settings and go back to the Zoom home screen.
Add your contributor as a contact if not added already. Click on the Contacts button at the top, middle of the Zoom home screen then click the plus + symbol next to where it says “Directory Channels”.
Ask your contributor to check their emails and to click on the link to accept your contact request. They may have to enter their zoom login details to complete this.
You should host the meeting (initiate it) as you’ll automatically have permission to record it.
Click on the orange “New Meeting” button, click on “Invite” then click on your contributor from the “Contacts” section. Type their name in to find them if not displayed. Click on invite
Ensure that you are both using the best microphone source available in your Mic options. If you are using hands-free earpieces or headsets, make sure the mic from these is the one selected for best audio quality.
Press the record button at the bottom of Zoom
The current view will be recorded, whether gallery view or speaker view. After leaving the meeting you will get a dialogue box to say the session is being converted to a file and downloaded. The download folder should open up and you will see both a video file and the audio-only files in a folder called “Audio Record”.
Remember that Zoom meetings only last 40 minutes at a time. That is okay though as splitting a long interview across multiple files is good practice for avoiding loss of data.
Upload your recordings to UWL Onedrive for sharing.
In post, you would need to mute the audio tracks from the video file itself, add the separate audio tracks underneath then check they are in sync. If this is ever a problem you can just use the mixed audio instead.
Recording a Skype video call from within the app:
Only use Skype if your contributor cannot use Zoom.
Install Skype. ![]()
Create or sign in to your Skype account.
Before you start a meeting, first add your contributor as a contact using their email address or Skype user name.
Send them an instant message through Skype and they will be prompted to add you as a contact.
Start a video call with your contributor.
Ensure that you are both using the best microphone source available in your Mic options. If you are using hands-free earpieces or headsets, make sure the mic from these is the one selected for best audio quality.
Press the “More Options” button at the bottom right of Skype and press “Start recording” To end the recording press “Stop recording” in the top left of Skype
End the call
In the chat window you will see a large thumbnail of the recording, click on the more options three dots next to the time of the recording and click Save as, choose where to save the video. If the blue “Downloading” message doesn’t go away and the file is not actually saved it is likely there was a server error. Close Skype down and restart it and you can try downloading the video again.
The recording is made as a widescreen 16:9 video but shows you and the contributor next to each other in a 50:50 split-screen view. This cannot be changed.
As the framing for each person is now much squarer than the original webcam images, you lose the sides of each person’s picture. You will both need to place yourselves right in the middle of your webcam frame. Do a test recording to find out how it looks.
Upload your video files to your UWL Onedrive for sharing.
Official Skype Recording guide
Call Recorder for Skype Mac Software (7-day trial version then 39.95USD)
Method 3: Mac only, Highest quality, extra software and settings needed
Recording the video
QuickTime Player also has a screen-recording feature, and you don’t need macOS Mojave to use it.
- Open QuickTime Player from your Applications folder, then choose File > New Screen Recording from the menu bar. The Screen Recording window opens.
- Before starting your recording, you can click the arrow next to
 to change the recording settings:
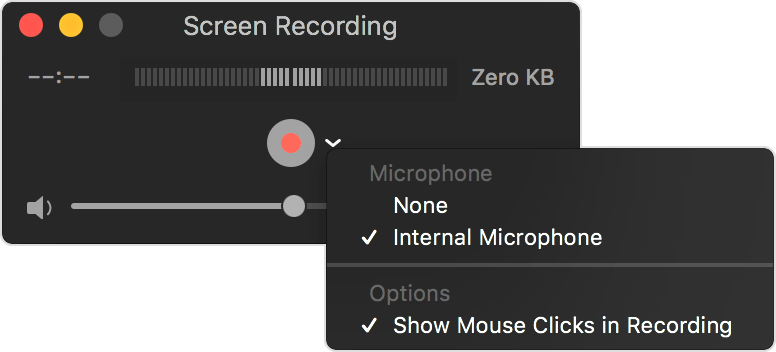
- To record your voice or other audio with the screen recording, choose a microphone. To monitor that audio during recording, adjust the volume slider (if you get audio feedback, lower the volume or use headphones with a microphone).
- To show a black circle around your pointer when you click, choose Show Mouse Clicks in Recording.
- To start recording, click and then take one of these actions:
- Click anywhere on the screen to begin recording the entire screen.
- Or drag to select an area to record, then click Start Recording within that area.
- To stop recording, click
 in the menu bar or press Command-Control-Esc (Escape).
 - After you stop recording, QuickTime Player automatically opens the recording. You can now play, edit, or share the recording.
Find further details here –
CNET Guide to recording video calls on a Mac (article)
How to record the screen on your Mac – Apple support
Method 4: Windows only, highest quality, split track audio, £170 software needed
Open install and open Skype. You will need to login but you could create a new account if needed.
Once you have setup your new Skype account, sign into it.
Before you start a meeting, first add your contributor as a contact using their email address or skype name.
Send them an instant message through Skype and they will be prompted to add you as a contact.
Once they have accepted your contact request you can start a video call with your contributor.
Ensure that you are both using the best microphone source available in your Mic options. If you are using hands-free earpieces or headsets, make sure the mic from these is the one selected for best audio quality.
Configure Camtasia to capture the desired video area and audio tracks correctly. Start recording in Camtasia and switch back to the Skype window to conduct the call.
Method 5: Skype only, lowest quality, both audio tracks are mixed, free Skype needed
This method gives poor quality picture and sound and the least control over framing, only use this method under the following circumstances:You cannot use screen recording software (see previous section)Open Skype.
Once you have setup your Skype account, sign into it. ![]()
Before you start a meeting, first add your contributor as a contact using their email address or skype name.
Send them an instant message through Skype and they will be prompted to add you as a contact.
Start a video call with your contributor.
Press the “More Options” plus symbol (+) at the bottom right of Skype, press “Start recording”. To end the recording press “Stop recording” in the top left of Skype
End the call
In the chat window you will see a large thumbnail of the recording, click on the more options three dots next to the time of the recording and click Save as, choose where to save the video. If the blue “Downloading” message doesn’t go away and the file is not actually saved it is likely there was a server error. Close Skype down and restart it and you can try downloading the video again.
The recording is made as a widescreen 16:9 video but shows you and the contributor next to each other in a 50:50 split-screen view. This cannot be changed. As the framing for each person is now much squarer than the original webcam images, you lose the sides of each person’s picture. You will both need to place yourselves right in the middle of your webcam frame. Do a test recording to find out how it looks.
Smartphone or Tablet
Method 6: Fair quality, separate audio tracks, requires extra hardware The only realistic method for WhatsApp calls.
You can record a video of whatever is displayed on the screen of most smartphones but when you start a video call using WhatsApp, the audio gets muted in the recording.
However, your contributor’s audio is still available out of your phone or tablet’s headphone socket so you can plug a lead into this and record their sound on a separate professional audio recording device.
iPhone users with no 3.5mm headphone socket will need to use a Lightning adaptor:
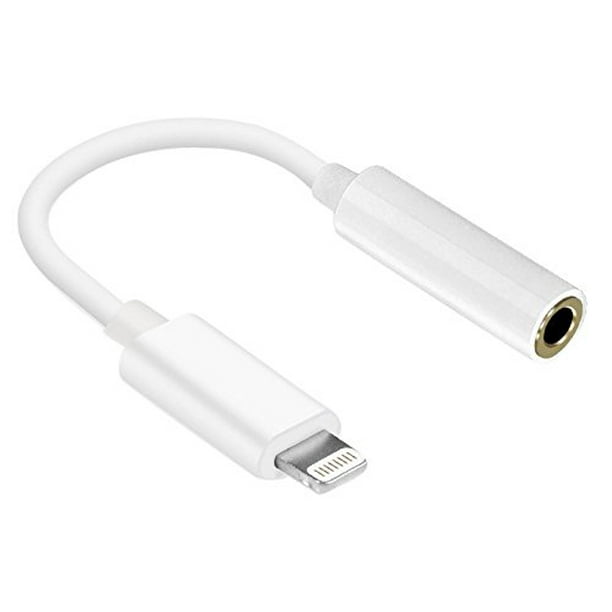
Your own audio – the speech from your side of the call – will not be recorded unless you also mic yourself up and plug that mic into the recorder as well. We recommend you use a clip on lapel mic with an XLR connector to do this.
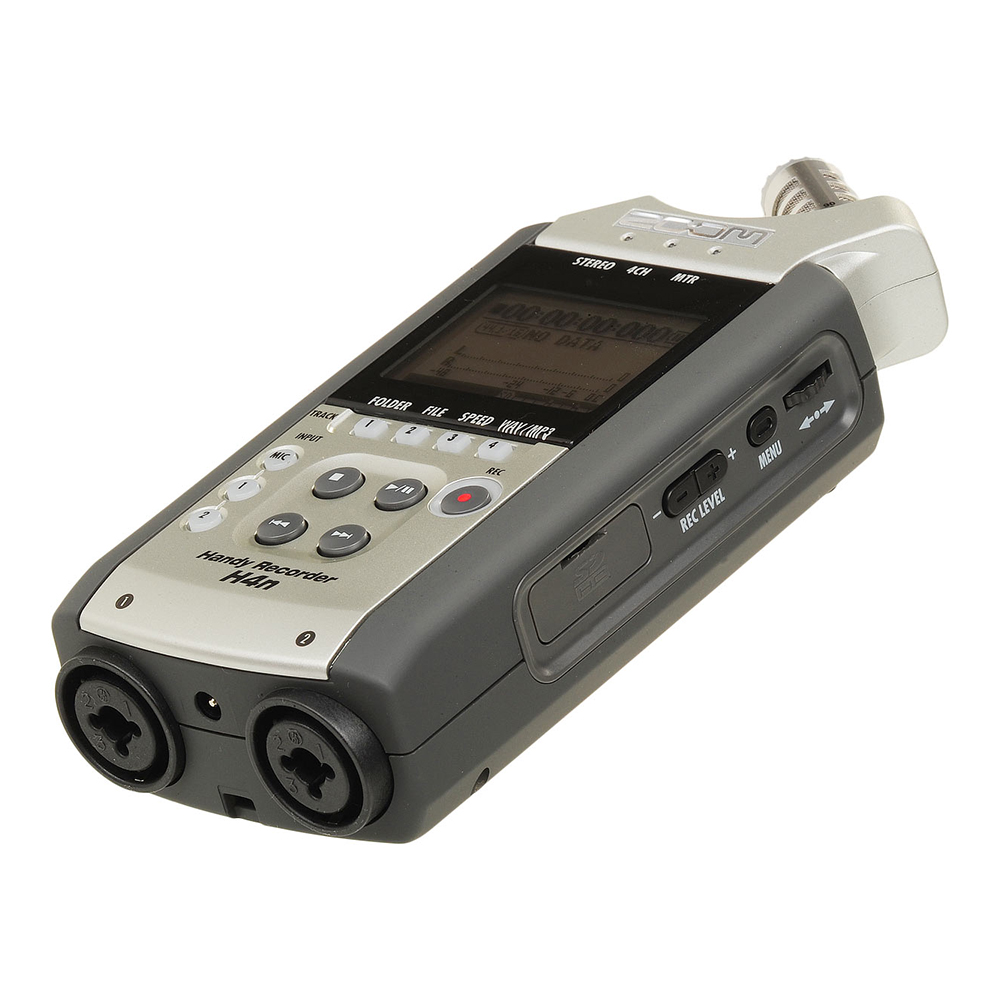
If you do not have any professional recording devices or mics with you we recommend that you request the following equipment from the distribution room when it is open.
1 x Zoom H4n Audio Recording Kit
1 x SD Card
1 x XLR to Minijack lead (stereo male to male)
Optional
1 x XLR Cable and Mic
This exact equipment may not be available – please contact them for advice.
If you have a video camera kit you can use this as an audio recorder and then strip the audio tracks from the video in post. If you use your own gear, you’ll still need to buy a 3.5mm Mini-jack to XLR lead (male to male). Make sure it is an “Unbalanced” type or it won’t work!
Smartphone Screen Recording.
iPhone
Here are instructions on how to record your iPhone screen
https://support.apple.com/en-gb/HT207935
Android
If you have a Samsung or LG device running Android v10 or later, you should have a screen recording function in your pull down menu from the homescreen.
If not, you can install a free app called AZ Screen Recorder

In the app settings you should change the frame rate to 25fps and choose a bit rate that will deliver files you can handle – 16Mbps might be sensible but it does go up to 24Mbps.
Experiment with the resolution to see which works on your device without squashing the image.
Even with audio enabled, it will not record audio from WhatsApp.
Make sure the input that you have plugged the smartphone headphone socket into on your audio recorder is set to “Line Level”.
Start recording on the audio recorder.
Start the video chat with your contributor with your screen recording running in the background.
You can send the video files straight to your UWL Onedrive after recording is finished.
The video and audio files will need to be synced up in post.
Method 7: Audio only, High quality, separate audio tracks, works on Desktop and Android devices. The contributor can be on any other device (including ios).
http://cleanfeed.net Is a cloud based solution and a really useful way to record and save good quality audio conversations and interviews.
*Please note this has restricted use on iOS mobile devices but this works on most Laptop/Desktop computers and Mobile devices, if it has a microphone.
Open a browser on your mobile device Go to cleanfeed.net and create an account / Login.
Click connect and enter your guests details or click on advanced tick box and copy the link.
Once your guest has joined the site you can talk to them To record the conversation click the circle in the top right of the screen.
Give the recording a name and choose how you want it recorded – ‘Split stereo’ is best for editing later. You should now have a tab with a red button giving you the record duration.
When recorded click the download button on this tab and save the recording to your device. Once downloaded to your device save the recording again somewhere safe.
However, if you want to record a phone interview with your iPhone here is a couple of links to articles explaining how.
Method 8: Microsoft Teams
Price: Free to download via your UWL account.
OS: Mac/Windows/Linux/ ios/Android
Microsoft Teams is used for meetings, group discussions, sharing files, classrooms, etc. You can create a one-off chat, run group sessions or call members of your team.

Recordings can be made during the session, once someone presses record it will inform others that the conversion is being recorded so make sure to ask others involved, if it is ok to do so as they may not want to be recorded. You can choose to use the web camera or just have your audio switched on (you can change your mind during the session by clicking the camera icon on screen same with the microphone). There are text chat functions.

If you wish to include someone who is outside UWL, you are able to send them a link. When the recording is happening it will split the screen with whoever is involved in the session creating a two-way recording (e.g. 2 people in a session it will split the screen in 2). Recordings are then shown in the group chat section
Links to app:
Useful videos/links:
https://regarding365.com/invite-anyone-into-a-microsoft-teams-meeting-no-really-anyone-7f2fd04e3585
https://www.youtube.com/watch?time_continue=65&v=jugBQqE_2sM&feature=emb_title