
Guide: How to create groups on Blackboard
Time to read: 10 ~ 20 Minutes
Operating System: Windows/Mac Computer
Web Browser: Google Chrome (recommended)
Table of Contents
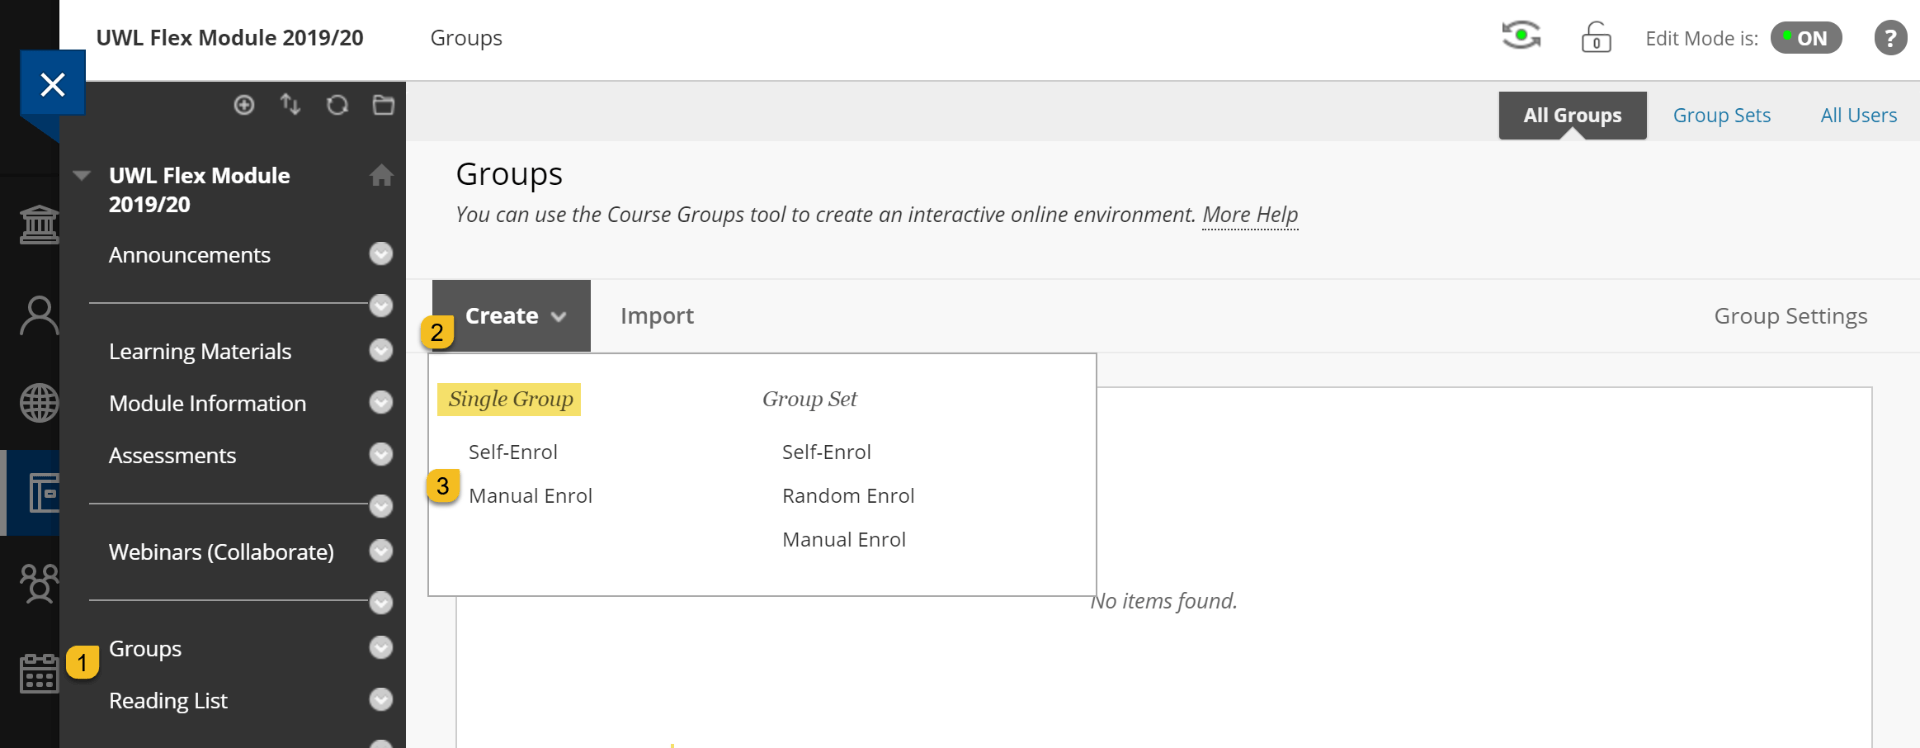
1- In the Single Group list, select Self-Enrol or Manual Enrol.
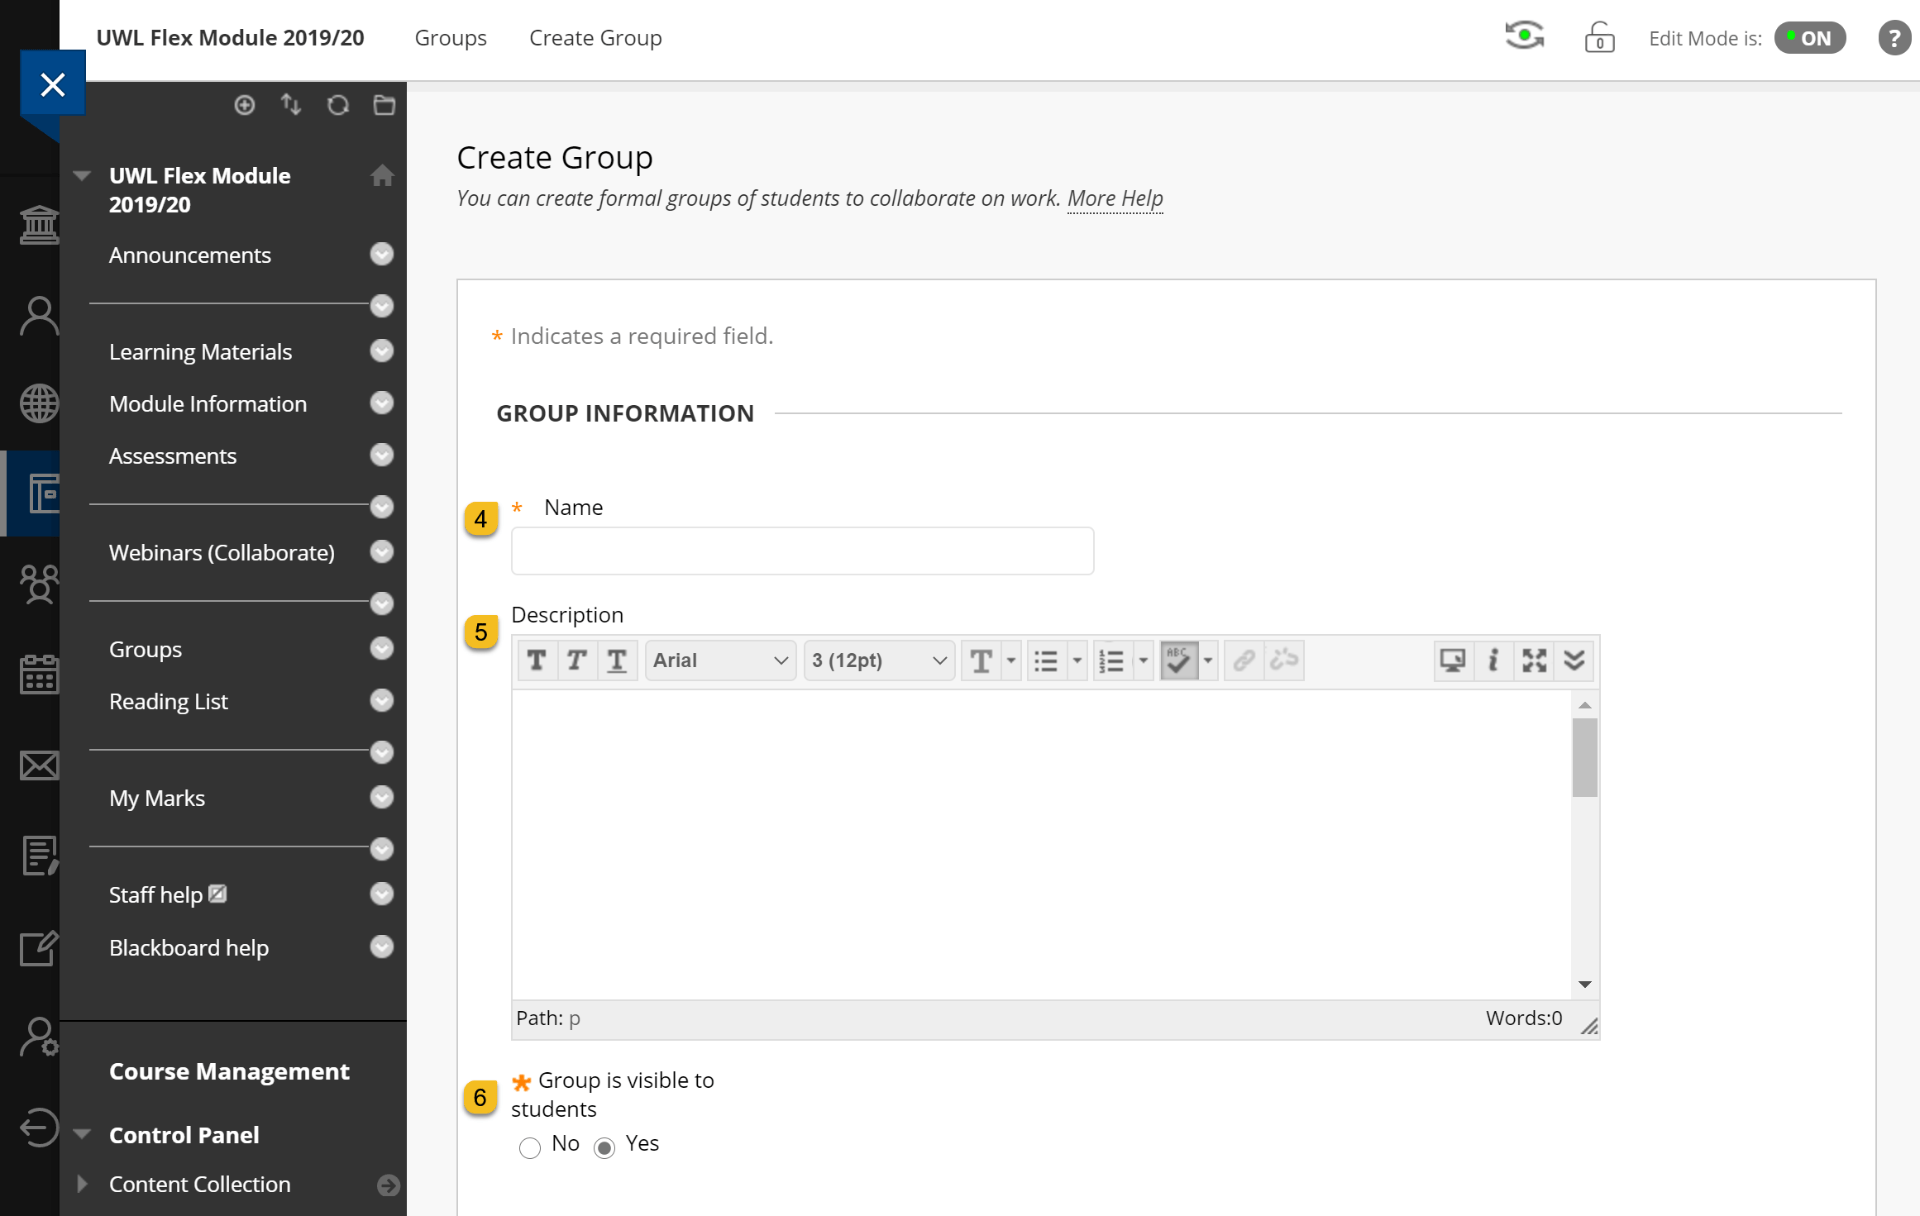
2- Type a name and optional description. Make the group visible to students.
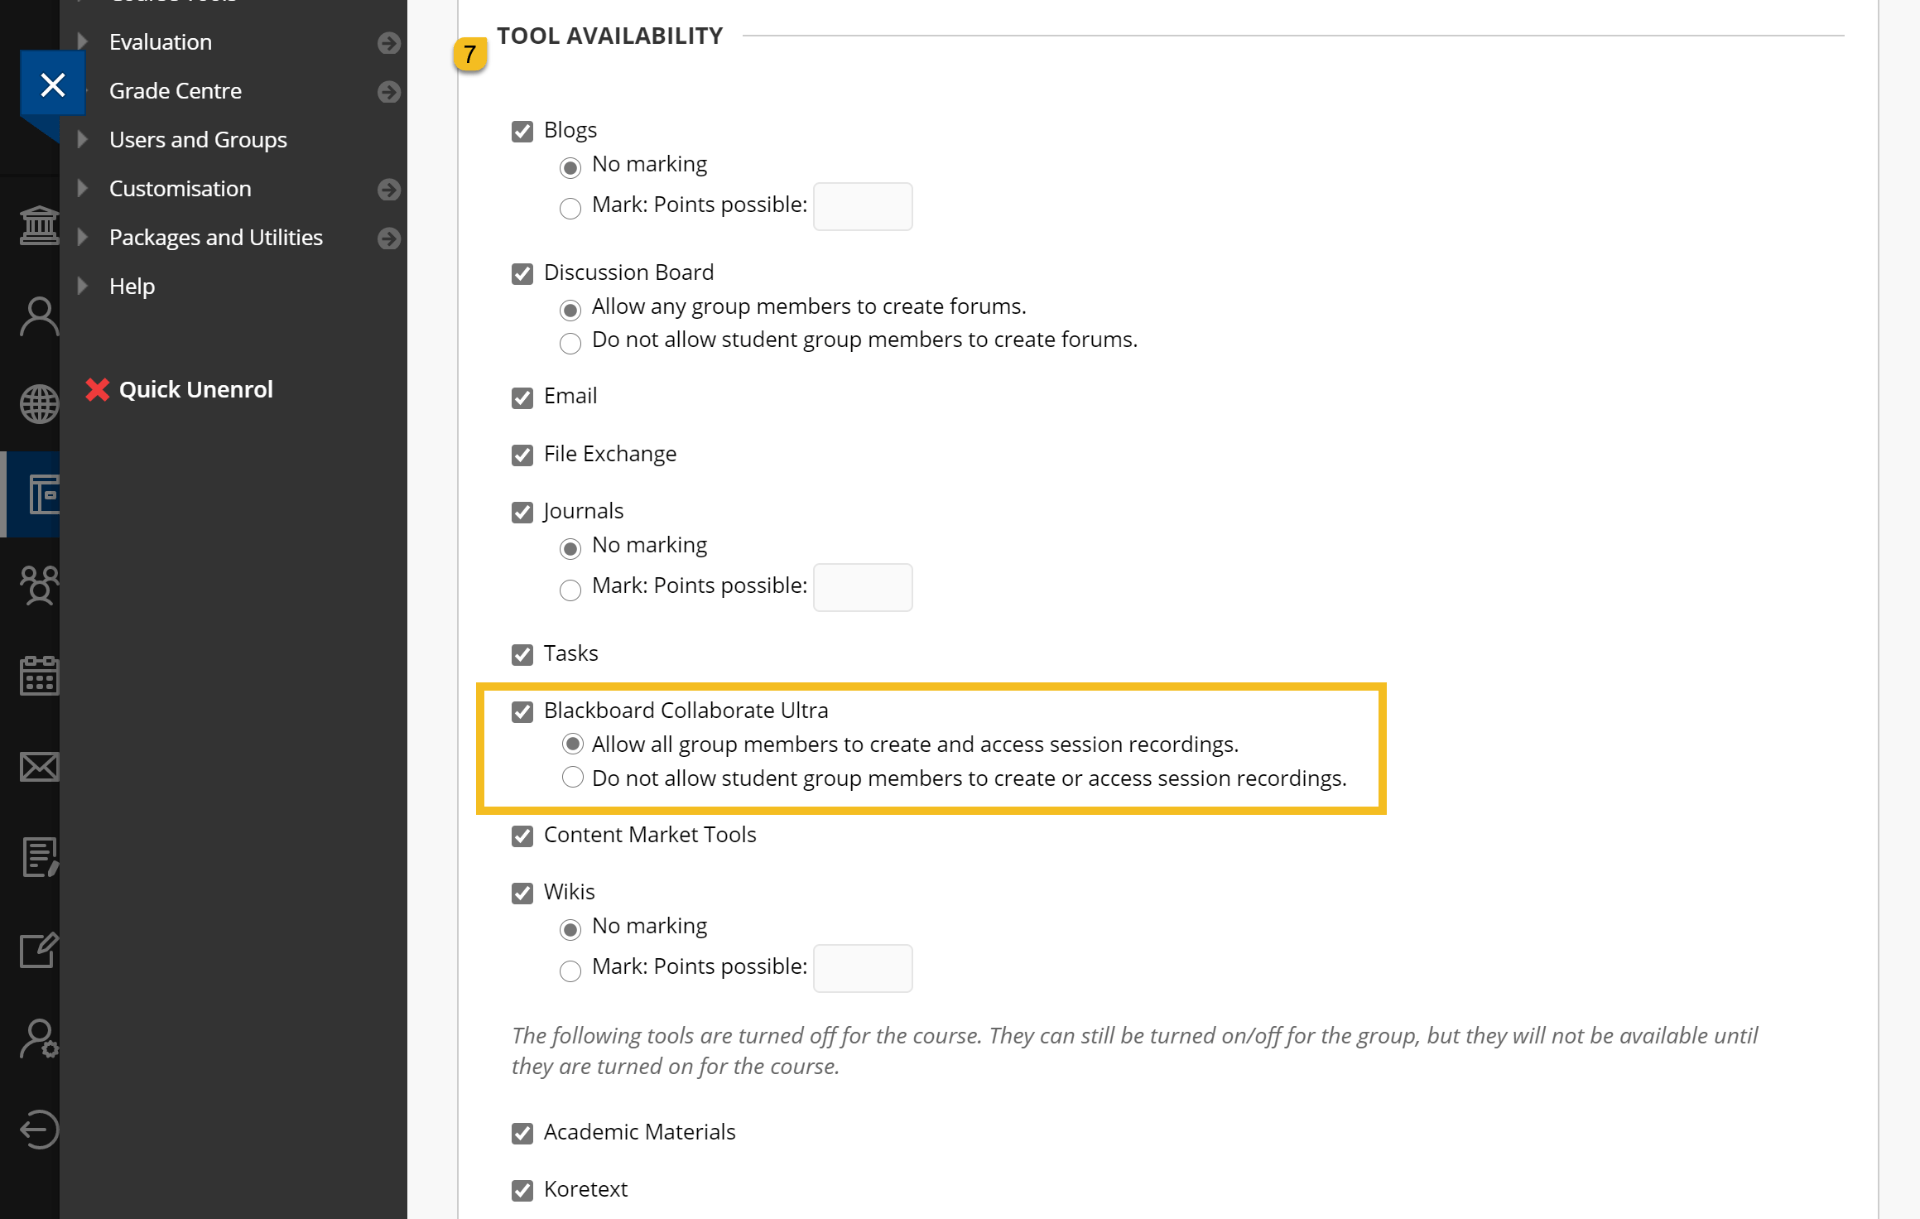
3- Select the checkboxes for the course tools you want to make available to the group.
Note: If you want to grade student submissions for blogs, wikis, and journals, select the Grade option and type Points possible.
Note: Each group will be assigned with a dedicated Blackboard Collaborate space which students can use for meetings and group projects.
4- Module Personalisation Setting
Step (8): Select the checkbox for Allow Personalization to let students add personal modules to the group homepage. Modules are only visible to the group member who added them.
Step (9): Optionally, select the checkbox to create a smart view for this group. more information on Smart View.

5- Add students
If you chose Self-Enrol, type a name and provide instructions. You might tell students that they can’t unEnrol themselves from groups. Type the Maximum Number of Members and select any other options you want to include.
-OR-
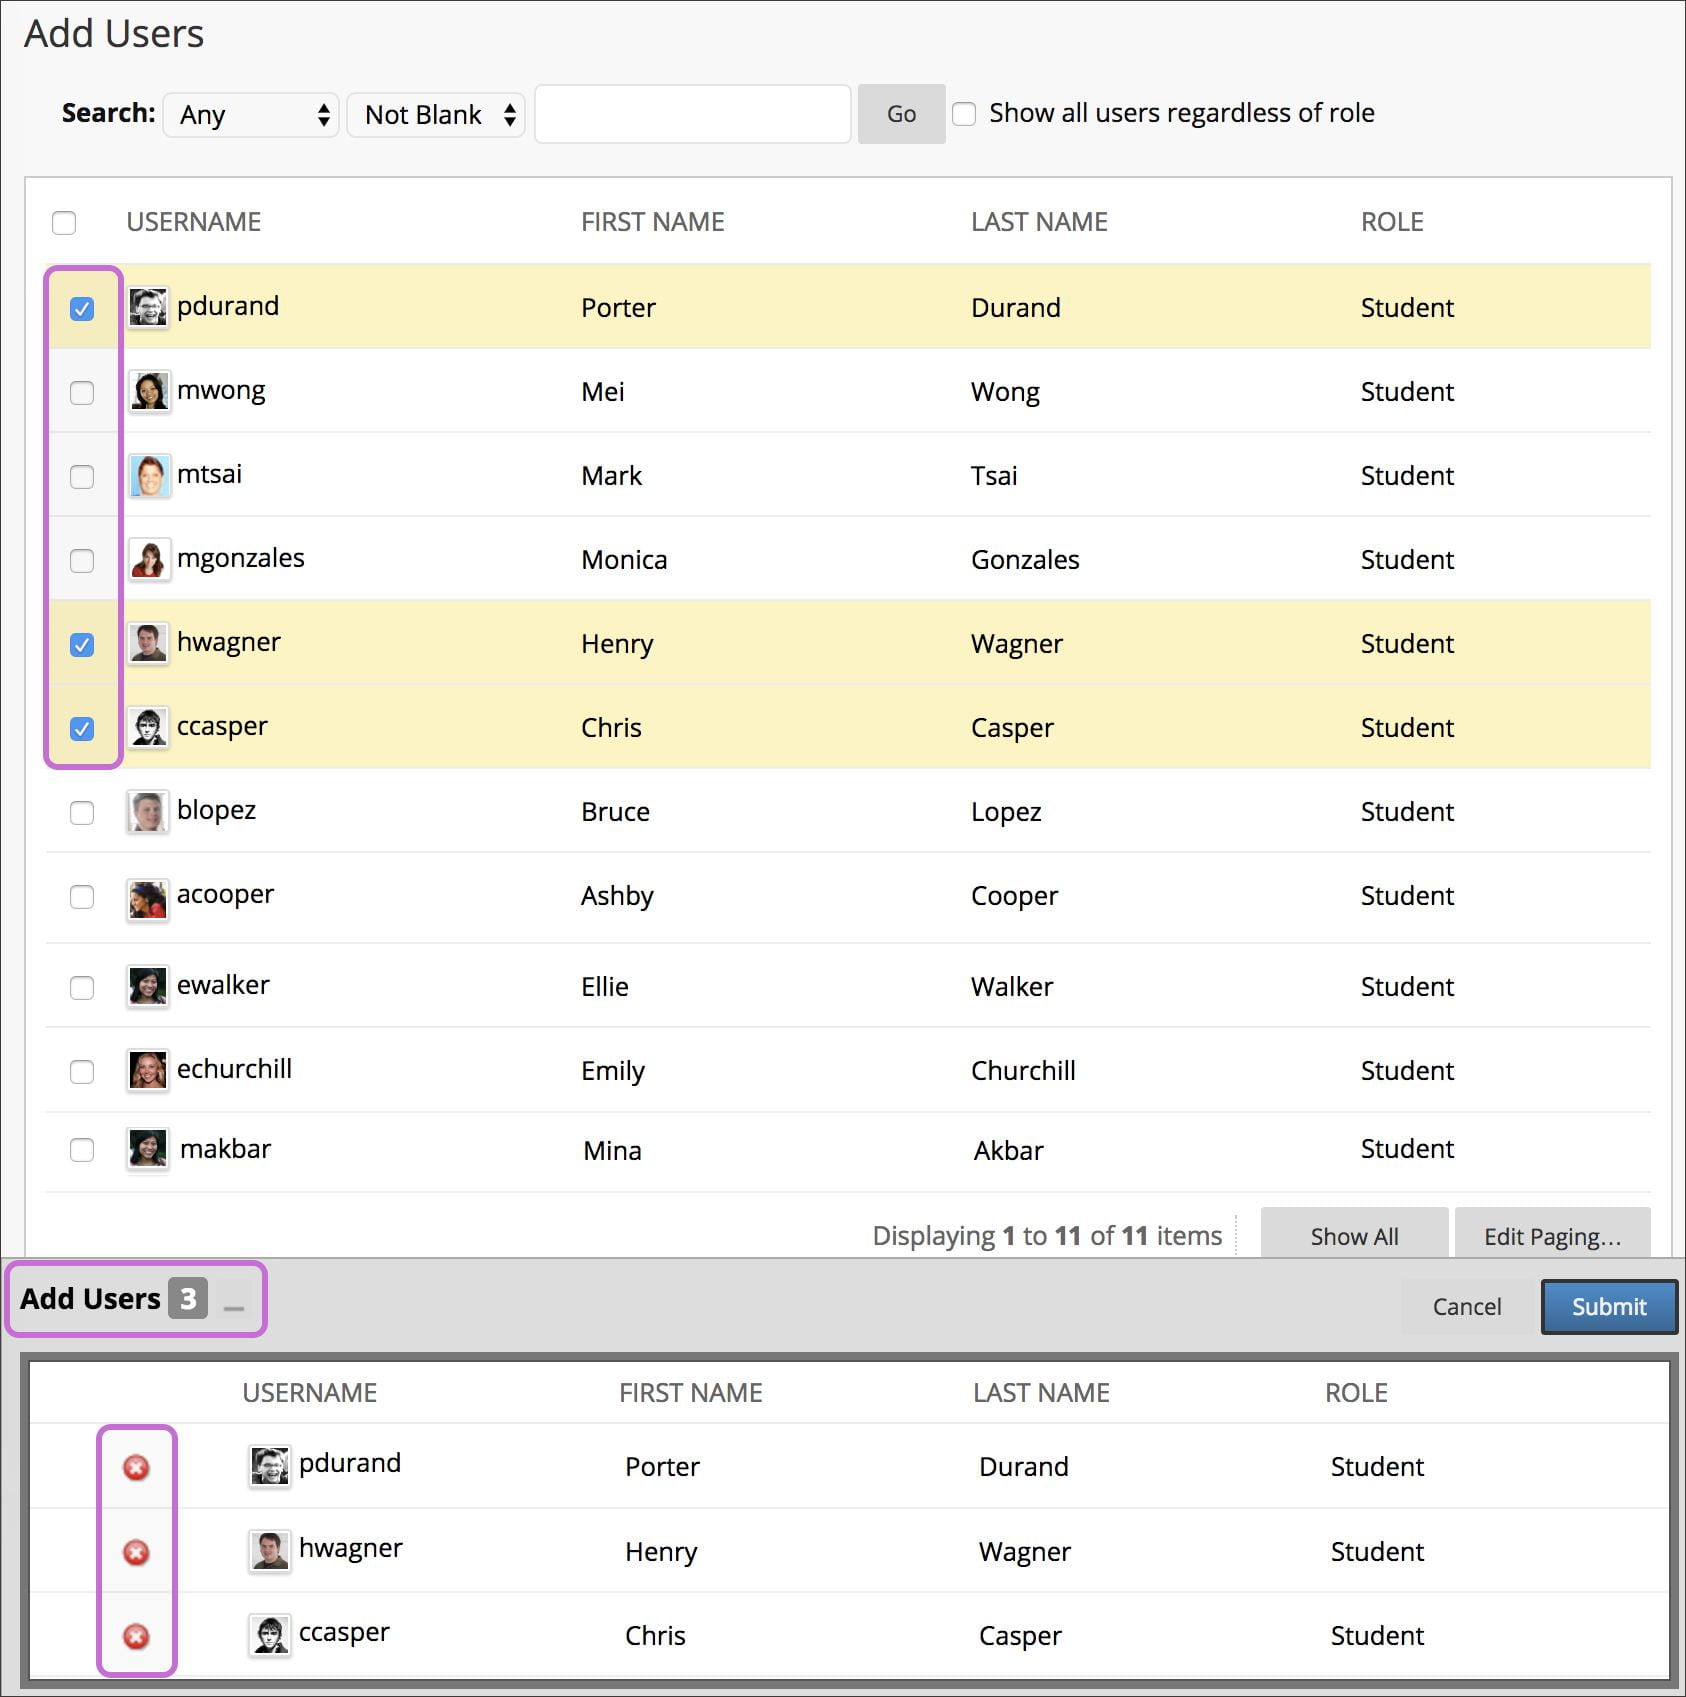
If you chose Manual Enrol, search for and select students from the Add Users pop-up window.
Your selected group members appear in the bottom area with a number showing the total count. Select the Show List icon, represented by a full square, to open the Add Users area to view your selections. To remove users, select the X next to their names.

6- Submit

Further information and guidance are available via Blackboard Help.
